Peripheral and Sensor Commands
Control peripherals and sensors
Control peripheral
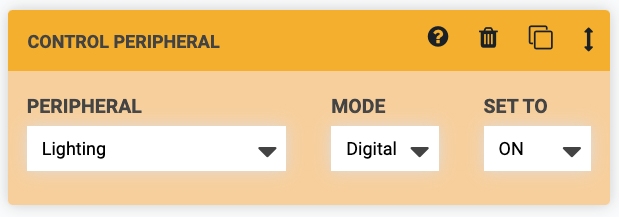
The Control Peripheral command allows you to control peripherals such as the vacuum pump, solenoid valve, and lights. To use this command, first select a peripheral from the PERIPHERAL dropdown. Options include:
- All of the peripherals you have defined in the peripherals section of the controls panel
- The Box LEDs, if you have any included with your FarmBot version
Next, select the MODE which you would like to control the peripheral with. You can choose either Digital or Analog.
Last, specify what value you would like the peripheral to be SET TO. The digital mode allows for turning the peripheral ON and OFF, while the analog mode allows for controlling the peripheral with PWM (pulse width modulation) to any value between 0 and 255.

Advanced options
In the sequence editor options menu ( icon next to the copy sequence button), there is an option to SHOW PINS. Enabling this setting will show additional options in the PERIPHERAL dropdown for all of the Arduino’s raw pins. If you have hooked up custom peripherals to any of the Digital Out or Analog Out pins on your electronics board, this is one way you can control them from a sequence like any other peripheral.
Under the hood, most peripherals are just pins
Remember in the controls panel how you defined your peripherals with a name and pin number? That’s because at the microcontroller level, those peripherals (vacuum pump, etc) are hooked up to a specific pin on the Arduino. Giving them a name just makes them much easier to work with here in the sequence editor.
Toggle peripheral
Coming soon
The Toggle Peripheral command allows you to toggle the state of a digital peripheral. For example, if a peripheral is currently ON, and then FarmBot toggles that peripheral, it will get turned OFF.
To use this command, select a peripheral from the PERIPHERAL dropdown. Options include:
- All of the peripherals you have defined in the peripherals section of the controls panel
- The Box LEDs, if you have any included with your FarmBot version

Read sensor
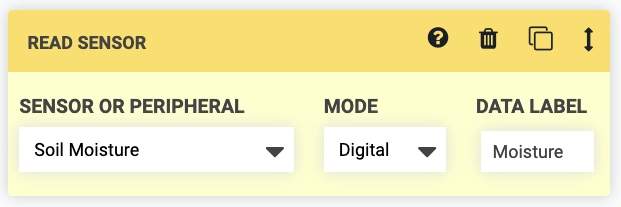
The Read Sensor command instructs FarmBot to read the value of a sensor. For example, you would use this command to measure the soil moisture content with the soil moisture sensor. To use this command, first select a sensor from the SENSOR dropdown. Options include:
- All of the sensors you have defined in the sensors panel
- All of the peripherals you have defined in the peripherals section of the controls panel
Next, select the MODE which you would like to read the sensor with. You can choose either Digital or Analog. Use digital for a 0 (LOW) or 1 (HIGH) response, and analog for a reading between 0 and 1023 for 0-5V.
Last, optionally provide a DATA LABEL to allow your recorded sensor reading to be more searchable at a later date.

Advanced options
In the sequence editor options menu ( icon next to the copy sequence button), there is an option to SHOW PINS. Enabling this setting will show additional options in the SENSOR OR PERIPHERAL dropdown for all of the Arduino’s raw pins. If you have hooked up custom sensors to any of the Digital In or Analog In pins on your electronics board, this is one way you can read them from a sequence like any other sensor.
Under the hood, most sensors are just pins
Remember in the sensors panel how you defined your sensors with a name and pin number? That’s because at the microcontroller level, those sensors (soil moisture, etc) are hooked up to a specific pin on the Arduino. Giving them a name just makes them much easier to work with here in the sequence editor.