Scan the Garden for Weeds
In this guide: Learn how to scan the whole garden for weeds using a group of points.
This guide assumes you have already calibrated your FarmBot’s camera.
Step 1: Create a point grid
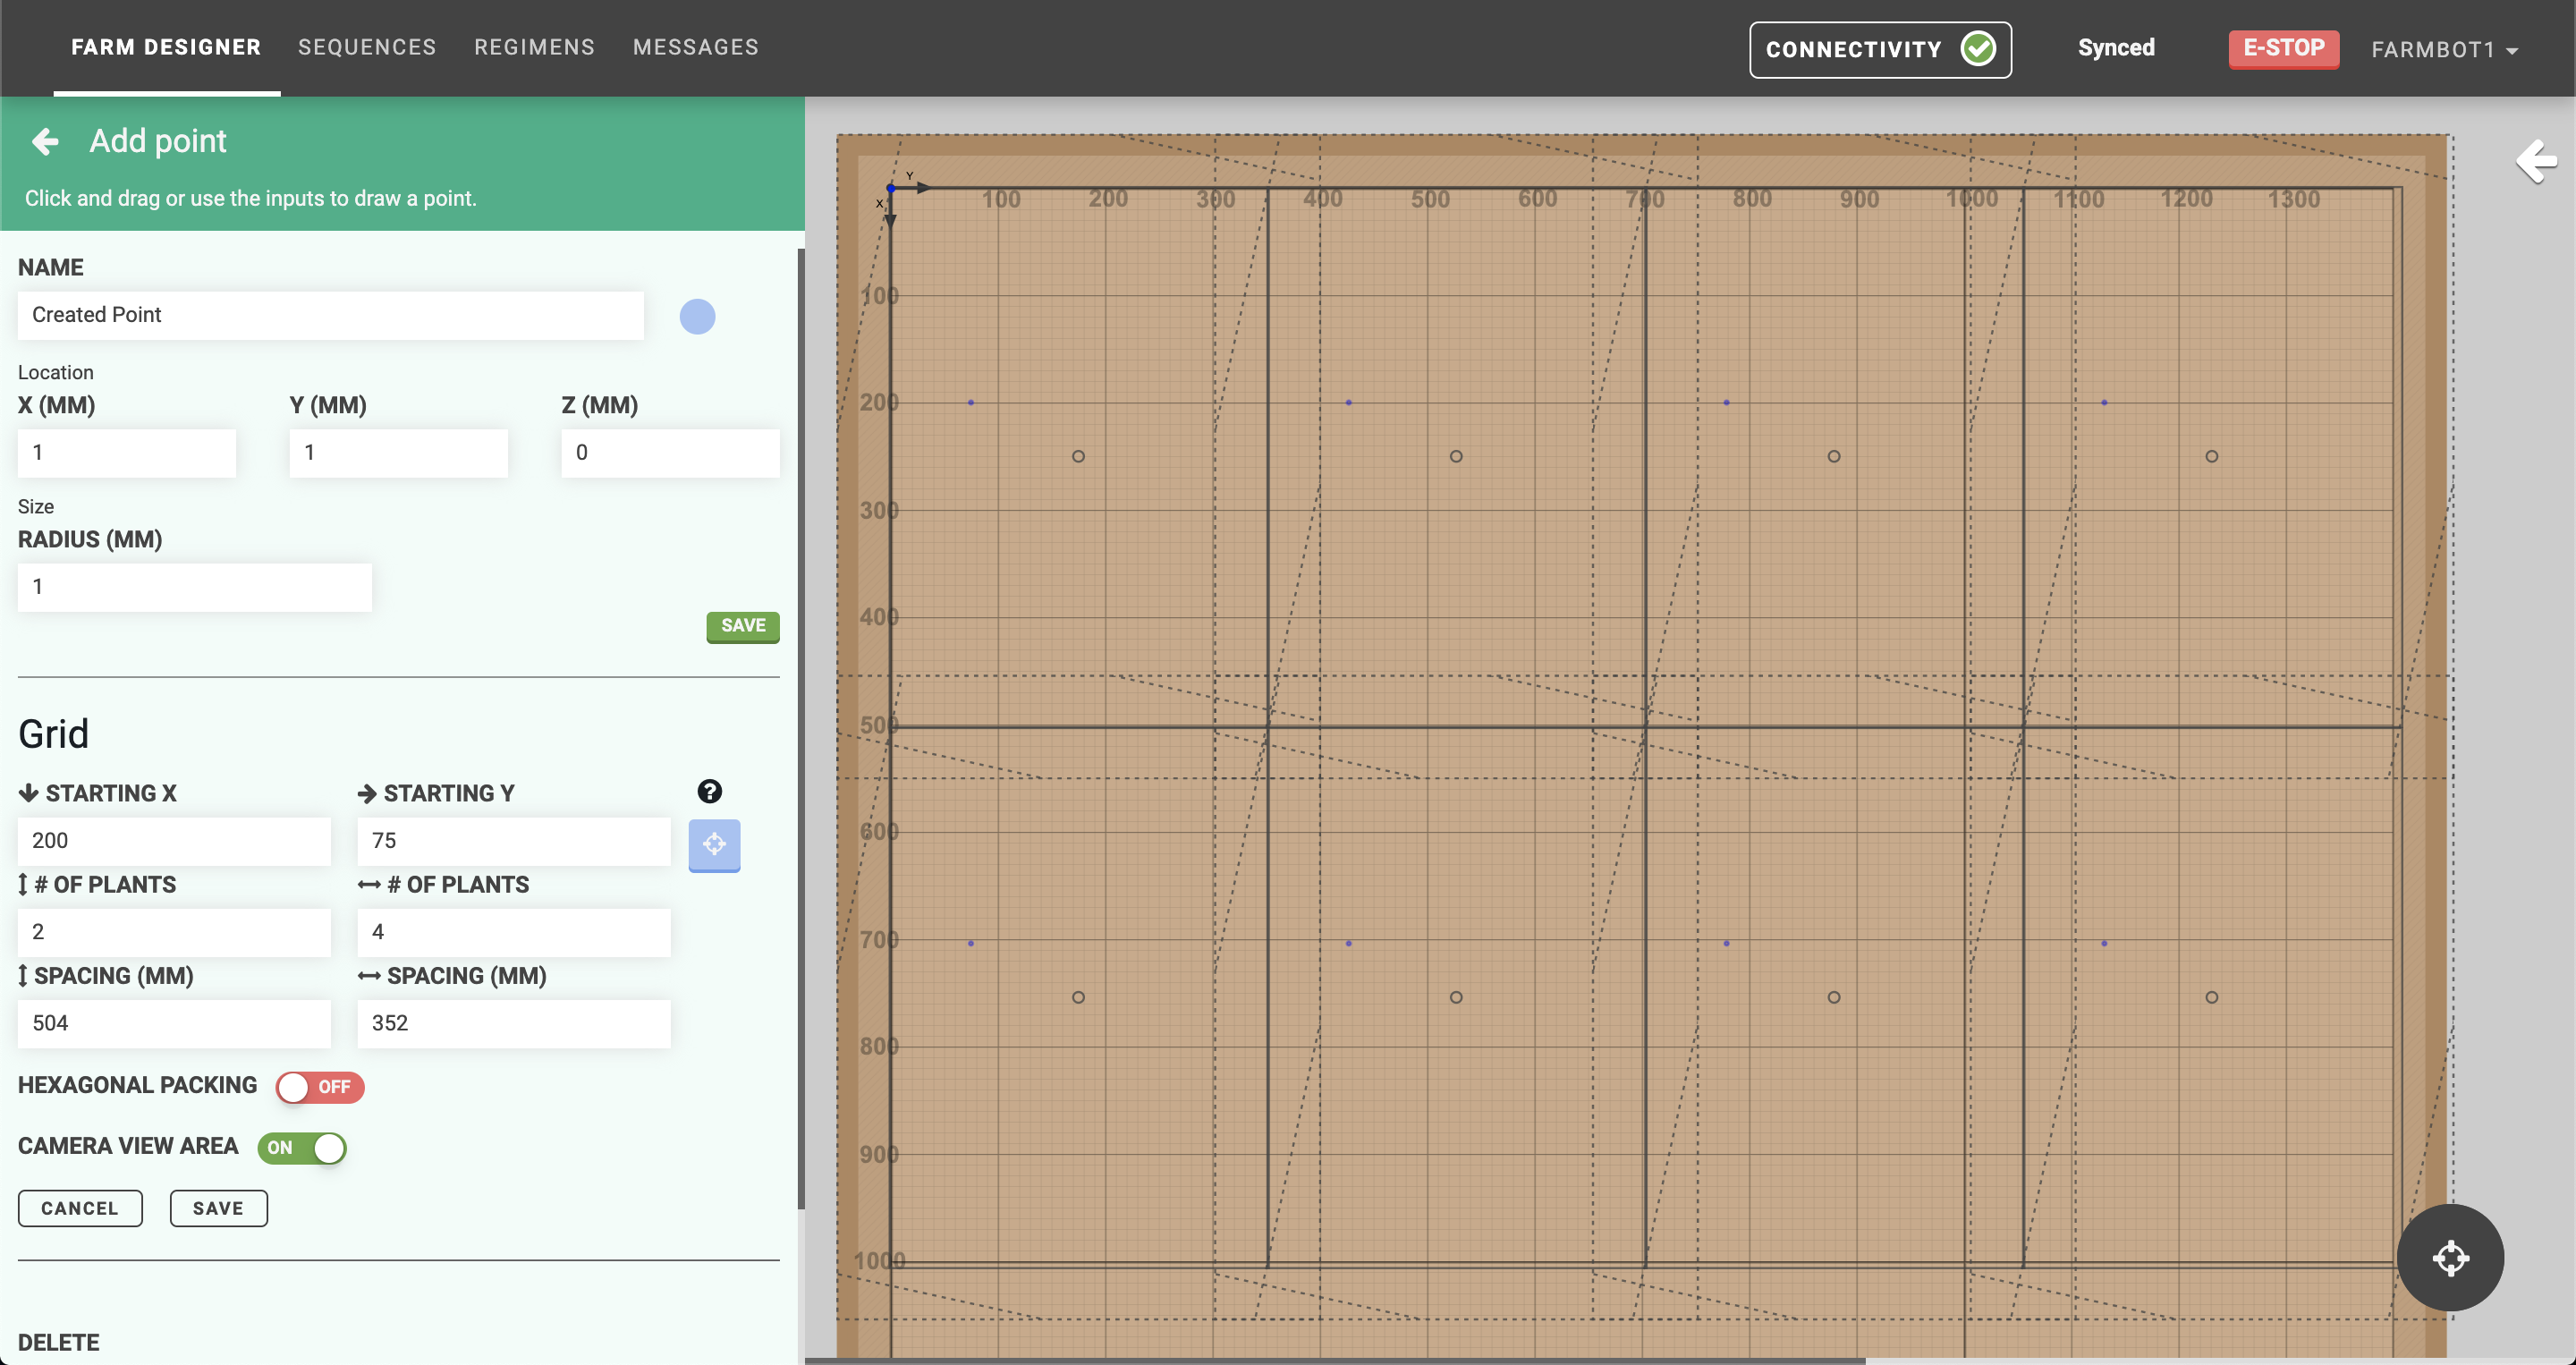
Create a grid of points for every location you want FarmBot to take a photo at by using the Grid feature in the Add point panel. Toggling CAMERA VIEW AREA ON will allow you to visualize the camera’s field of view in the map. Adjust the horizontal and vertical SPACING between points in the grid until there will be minimal overlap between photos. Then press SAVE.
Use a unique color for these points - it will come in handy in the next step!
Step 2: Group the points
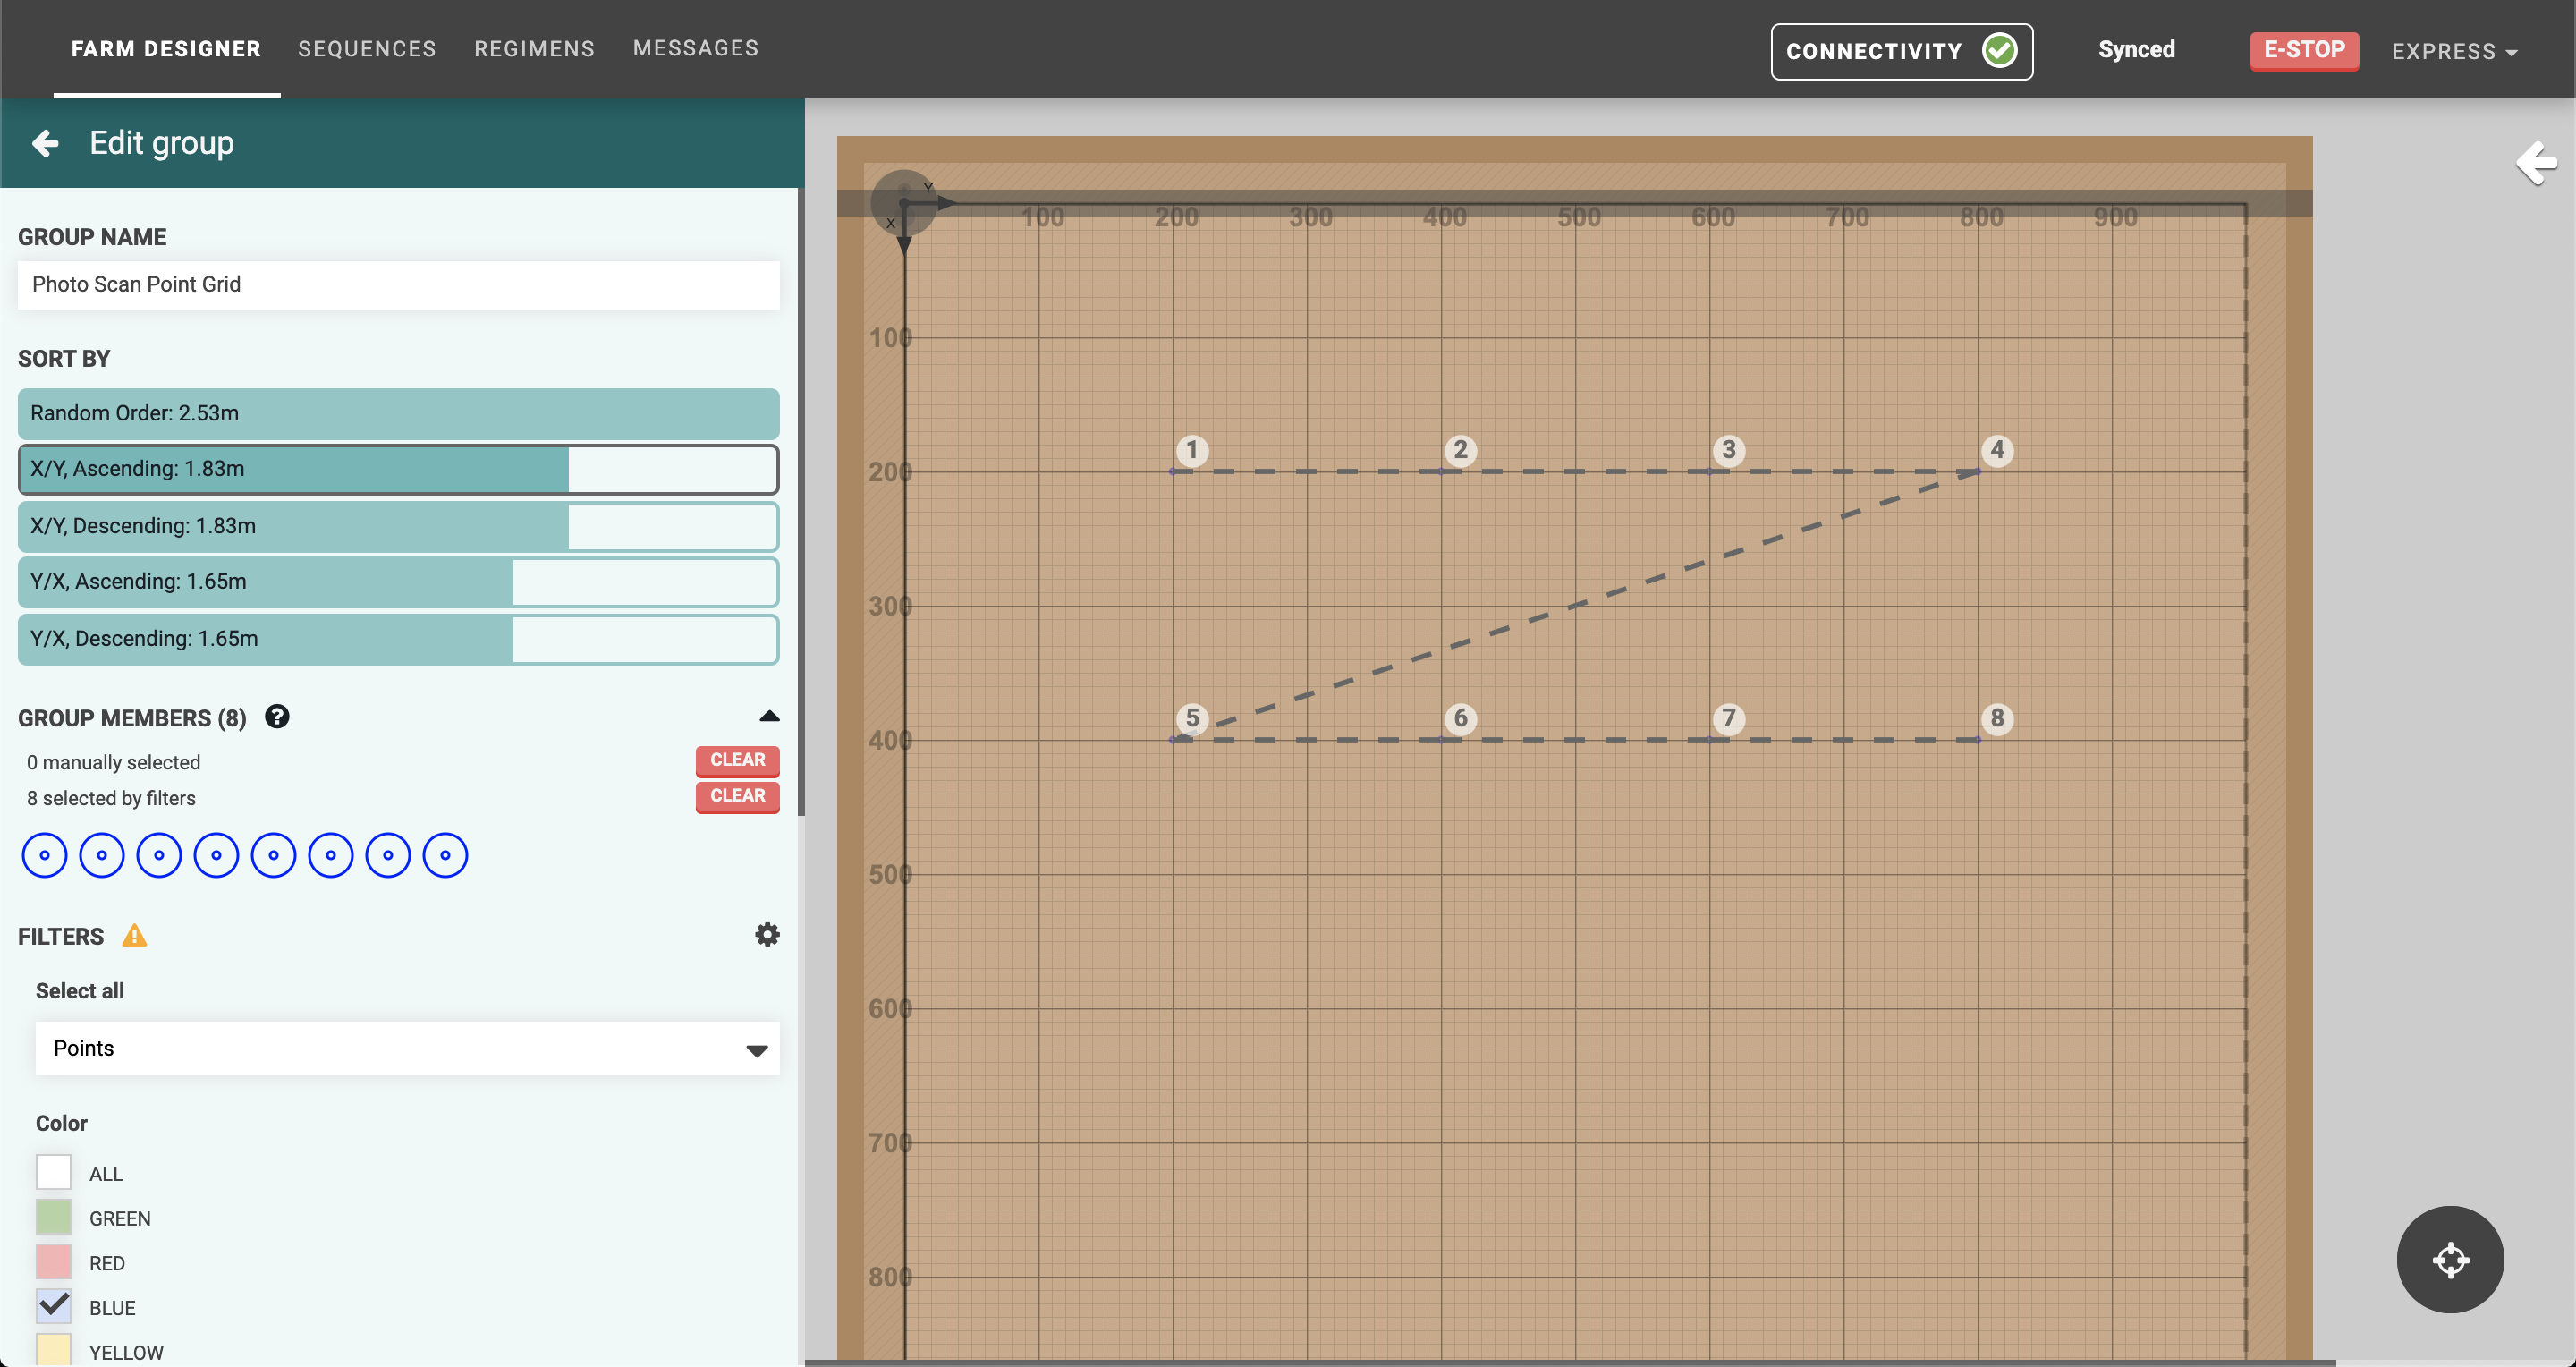
Create a group with all of the points in the point grid by first Selecting all Points and then checking the Color that you used in the previous step. Give the group a unique name such as Photo Scan Point Grid.
Step 3: Create sequences
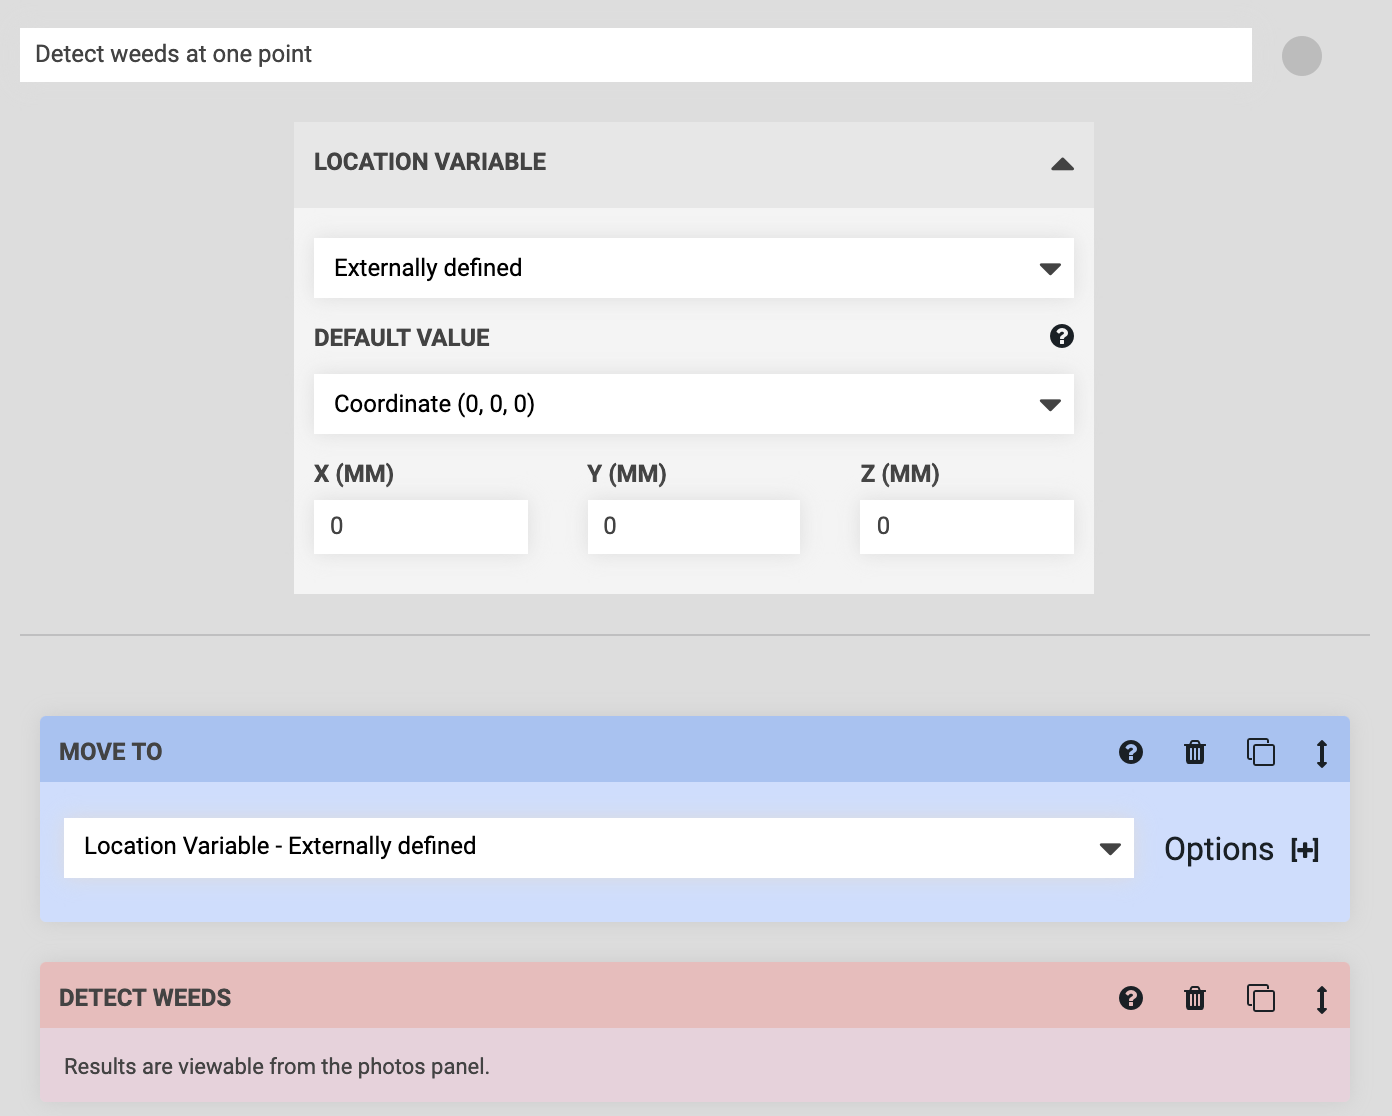
You will need to create two sequences to scan the whole garden. The first sequence will simply MOVE TO one of the points (via a location variable) and then DETECT WEEDS. We’ll call this sequence Detect weeds at one point.
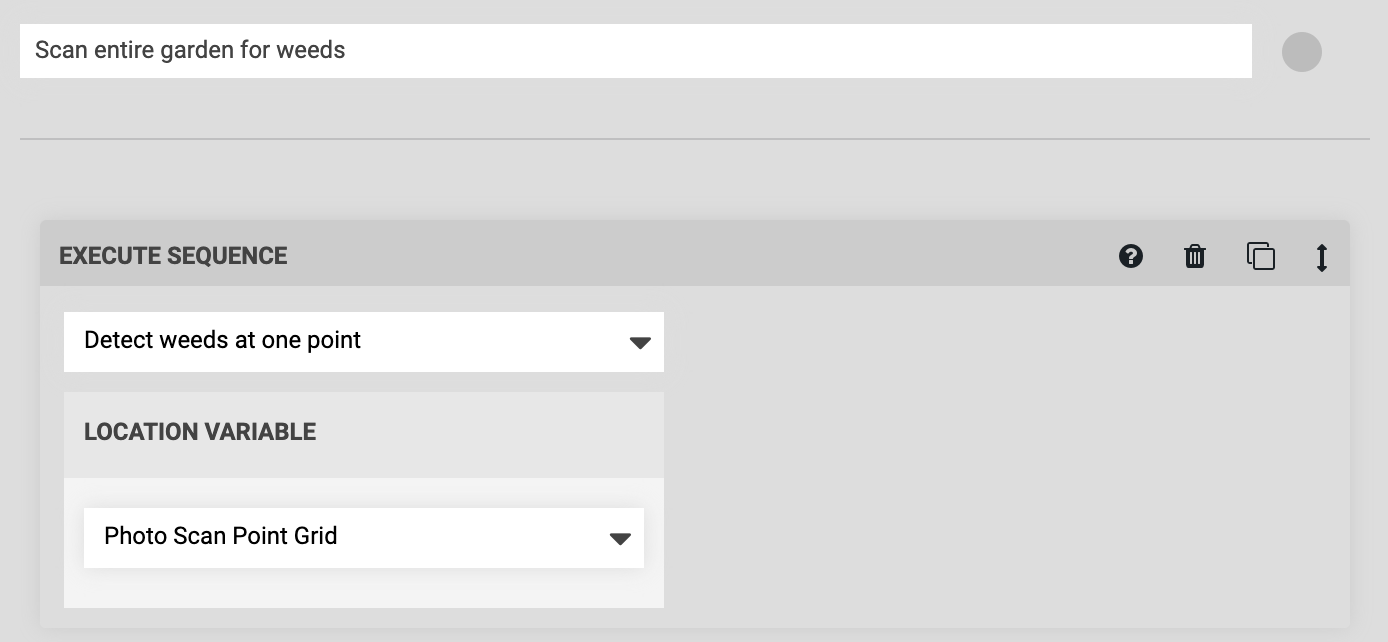
The second sequence will EXECUTE the Detect weeds at one point sequence for every point in the Photo Scan Point Grid group. We’ll call this sequence Scan entire garden for weeds.
Step 4: Scan the garden
You’re now ready to the Scan entire garden for weeds sequence and view the results in the farm designer.
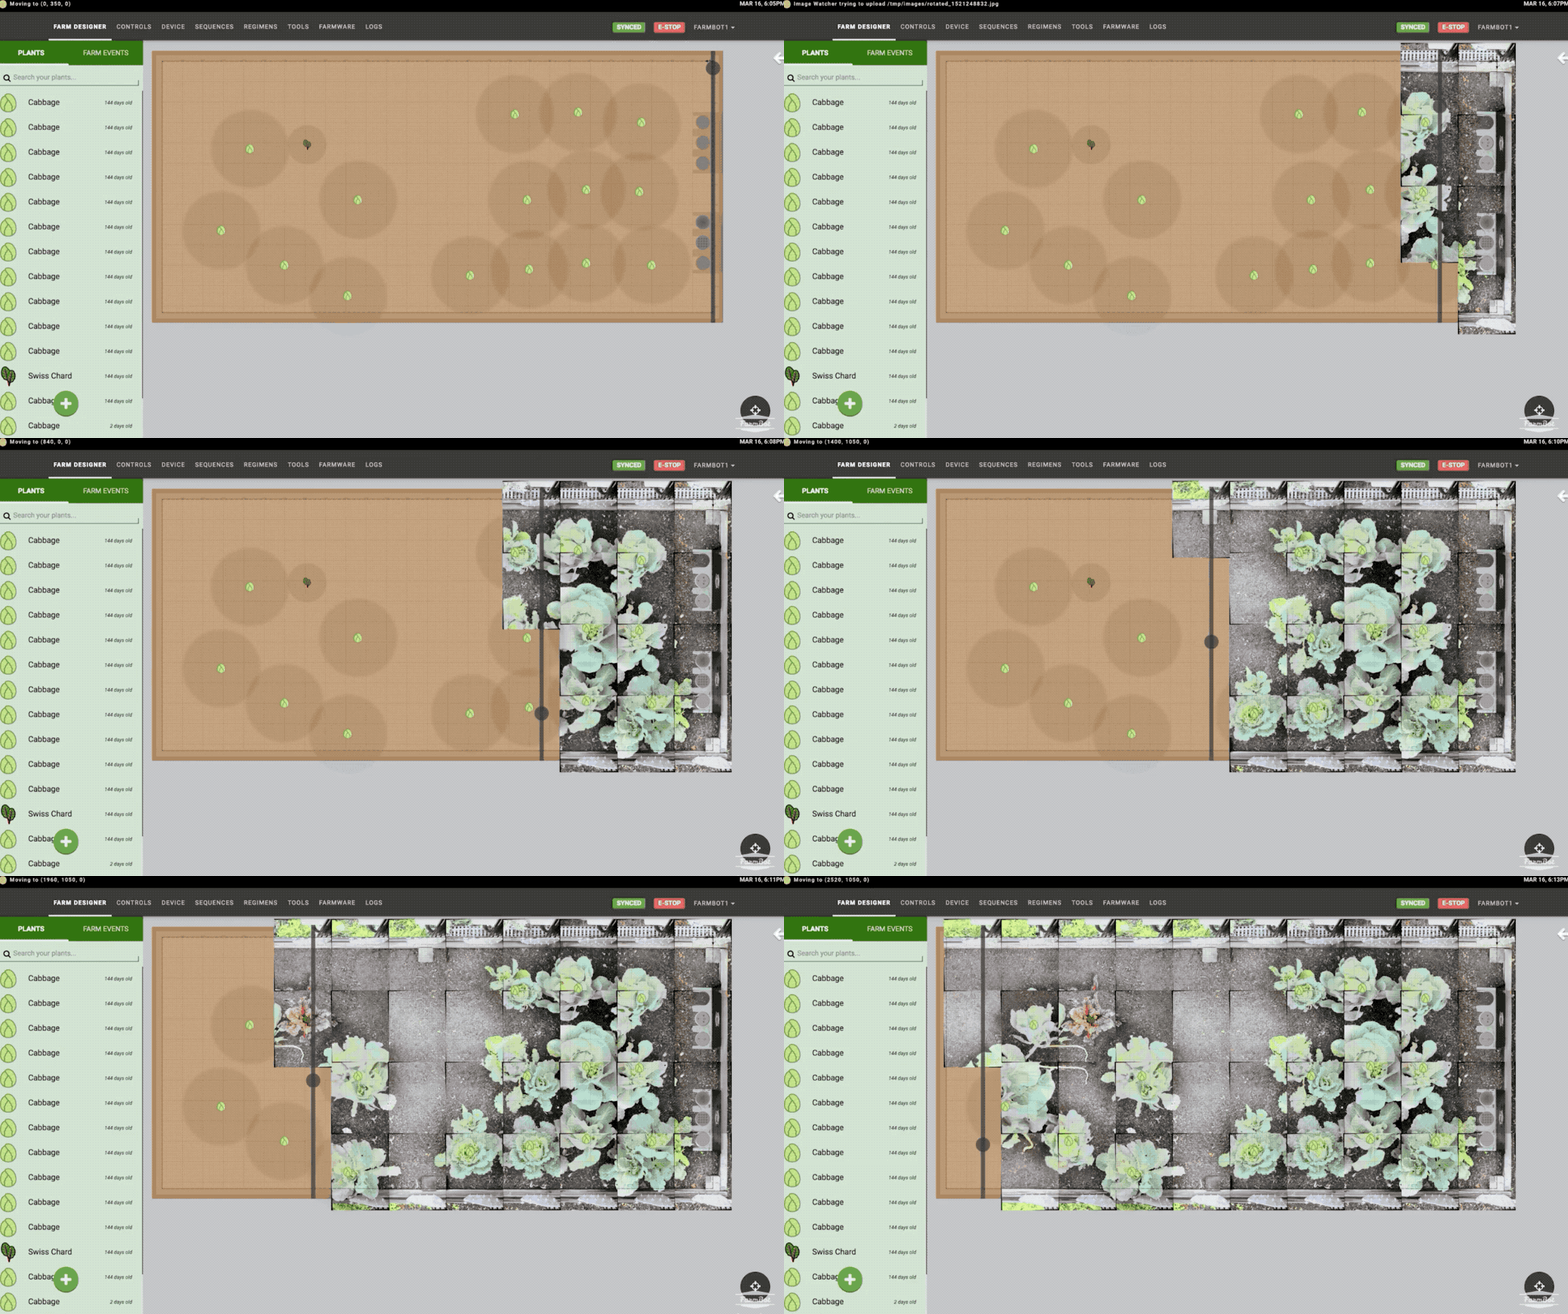
After the first test run, you may need to:
- Adjust the locations, spacing, and number of points in the grid
- Adjust the color range or other weed detection parameters