Pin Bindings
![]() Trigger actions and sequences with physical buttons or additional sensors.
Open these settings in the app
Trigger actions and sequences with physical buttons or additional sensors.
Open these settings in the app
It is no longer recommended to create and manage pin bindings from the settings panel. Instead, use the push button interface found in the peripherals section of the controls panel.
Pin bindings allow electrical signals from a button or sensor to trigger a FarmBot action or sequence. For example, a red button could be used to trigger the action as recommended with FarmBot Genesis v1.4+ and Express v1.0+ kits. For practical examples, see our use FarmBot’s buttons how-to guide.
Add a pin binding for a stock button
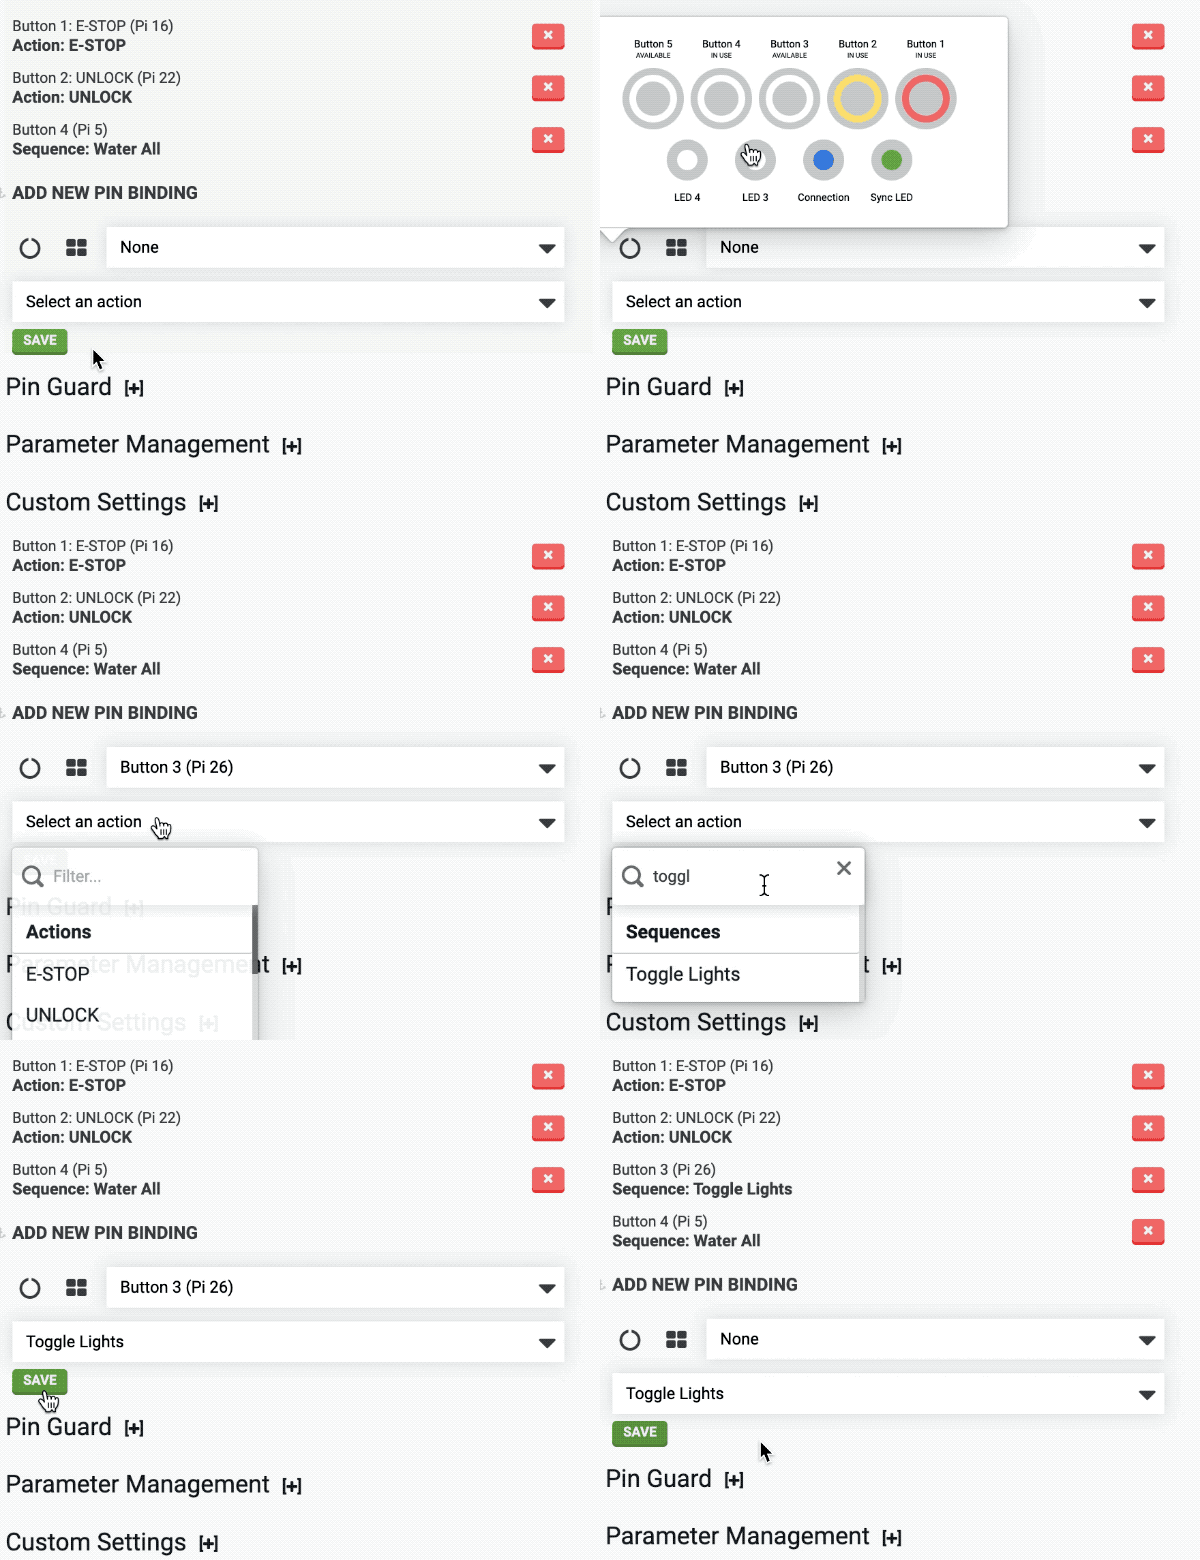
To add a pin binding for one of the stock buttons, click the icon to open the Push Button diagram and select the button you wish to add a binding for. Then choose the Action or Sequence you would like FarmBot to take when the button is pressed. Click to save the pin binding.

Add a pin binding for a custom GPIO pin
To add a pin binding for a custom GPIO pin, click the icon to open the GPIO diagram and select the pin you wish to add a binding for. Then choose the Action or Sequence you would like FarmBot to take when this pin goes high. Click to save the pin binding.
Warning
- Binding to a pin without a physical button and pull-down resistor connected may put FarmBot into an unstable state.
- Buttons should be connected between the selected pin and +3.3v.
Delete a pin binding
To delete a pin binding, press the button.