Building a Sequence
The general overview of creating a sequence is:
- In the Sequences panel, click
- In the Sequence Editor panel, enter a name for your sequence and assign it a color
- Drag and drop blocks from the Commands panel into the Sequence Editor panel
- For each operation, enter in your desired parameter values. Some parameters such as speed can use default values for your device and do not need to be entered in every time.
- Reorder, copy, and delete operations as needed
- Click
In the next sections, several sequences are built as examples.
Example 1: Create a tool mounting sequence
Let’s create a sequence to mount the watering nozzle as an example.
First, add the watering tool to the toolbay and follow the Tools instructions to add it to the web app.
Navigate to the Sequences page of the web app, and press the button in the left column (Sequences) to add a new sequence.
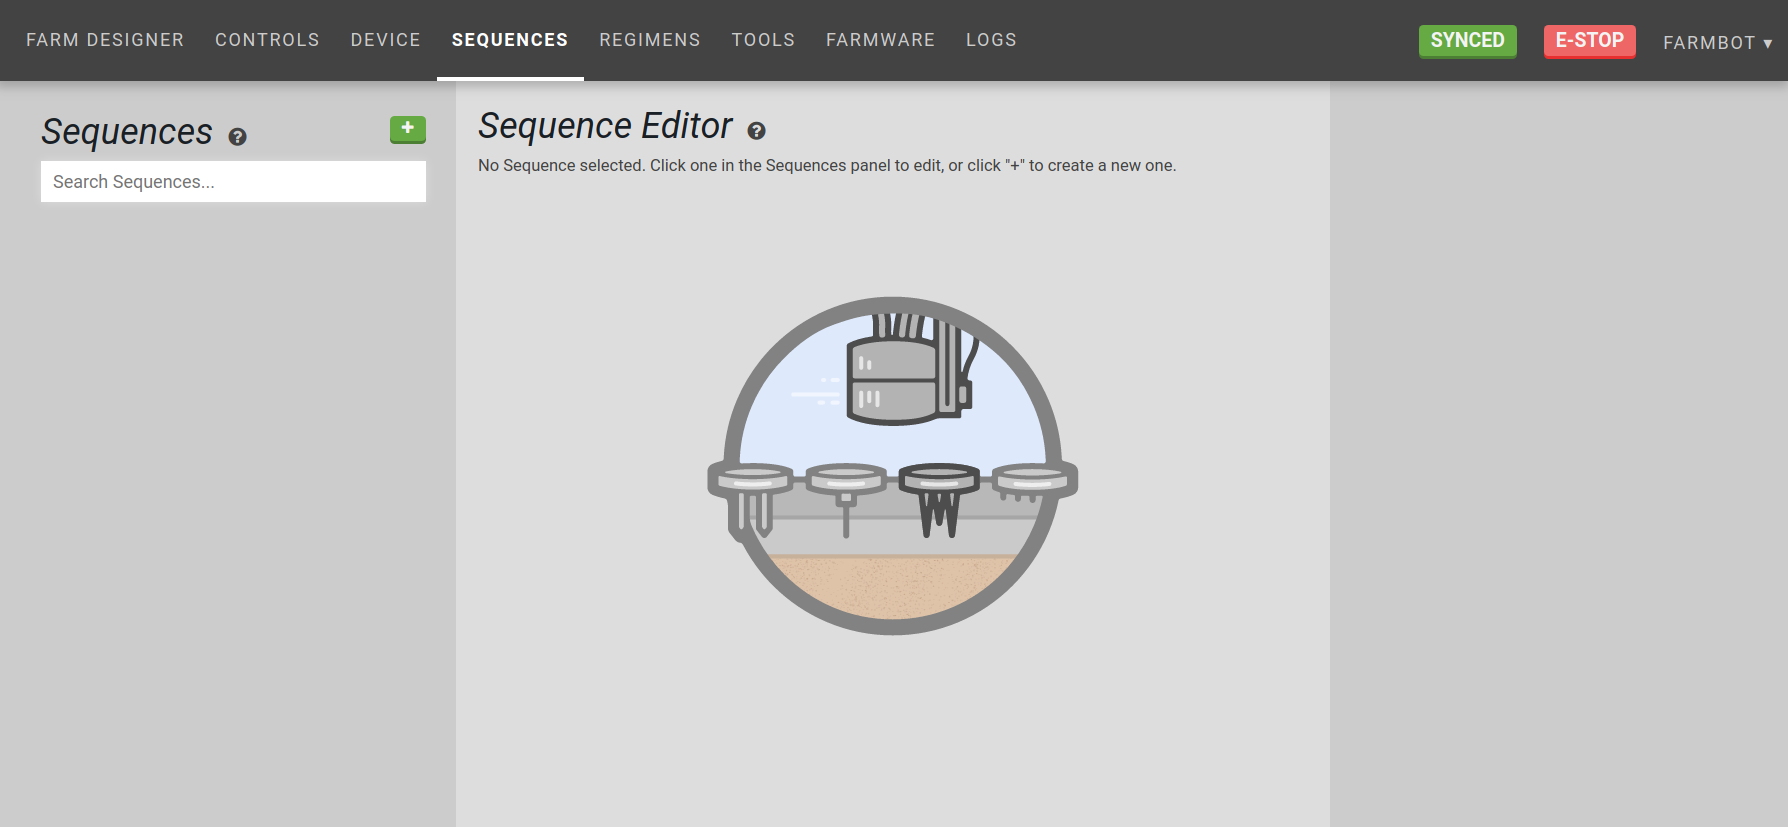
You will see the new sequence appear in the sequence editor in the middle column.
Give the sequence a descriptive name.
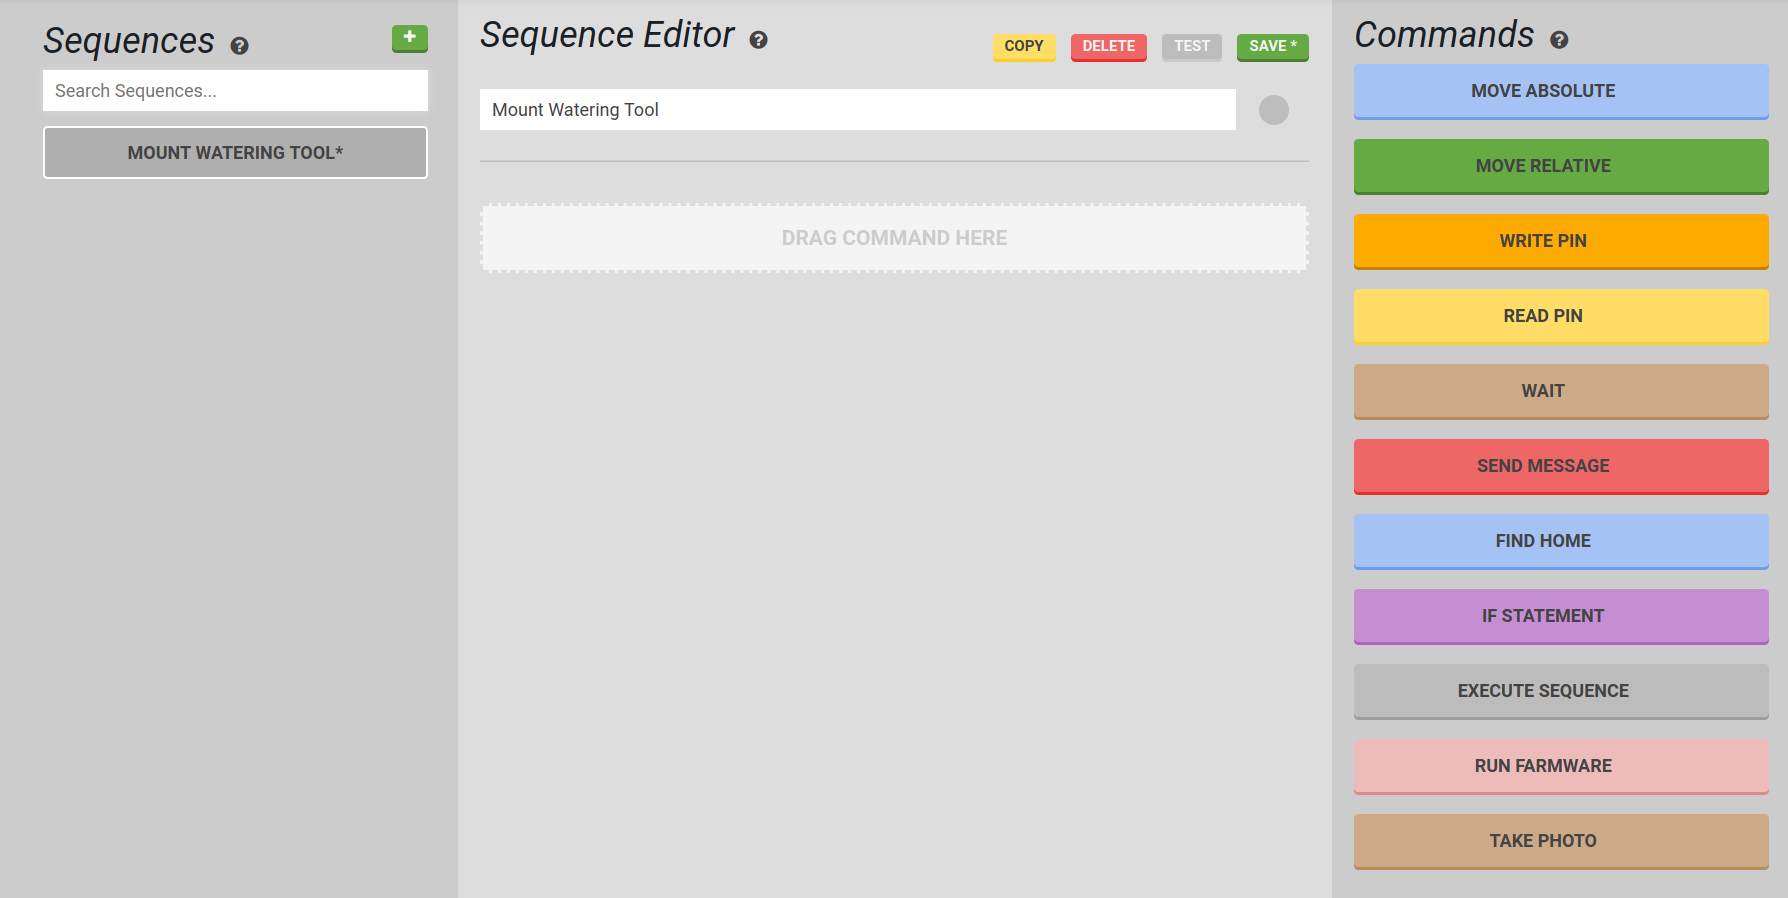
Begin the sequence with a movement to home. Add a Find Home command by clicking it or dragging it into the sequence from the commands (right) column.
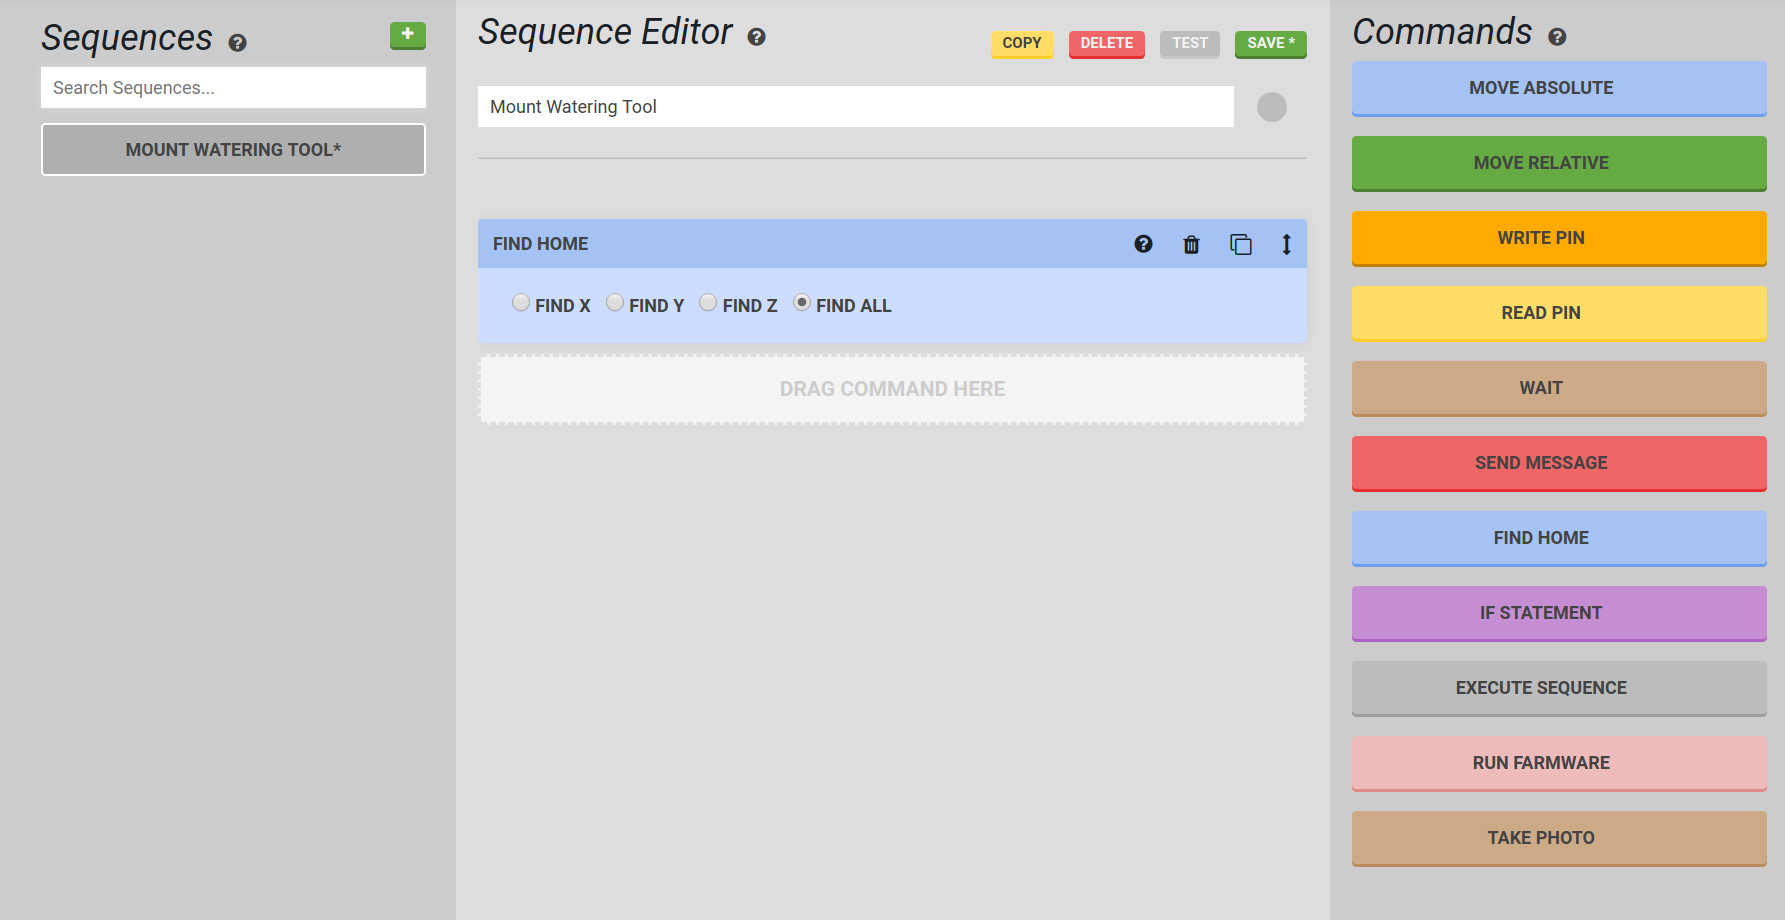
If you are not using encoders or endstops...
You may use a Move Absolute step to (0, 0, 0) instead of Find Home.
Next, add a step to move above the tool we want mounted, in this case, the watering nozzle. Add a Move Absolute command by clicking it or dragging it into the sequence.
Select the Watering Nozzle (added in the tools page) in the Import Coordinates From dropdown.
We want to move to the location directly above the tool before descending down to connect to the tool, so we’ll add a 100 mm Z-Offset.
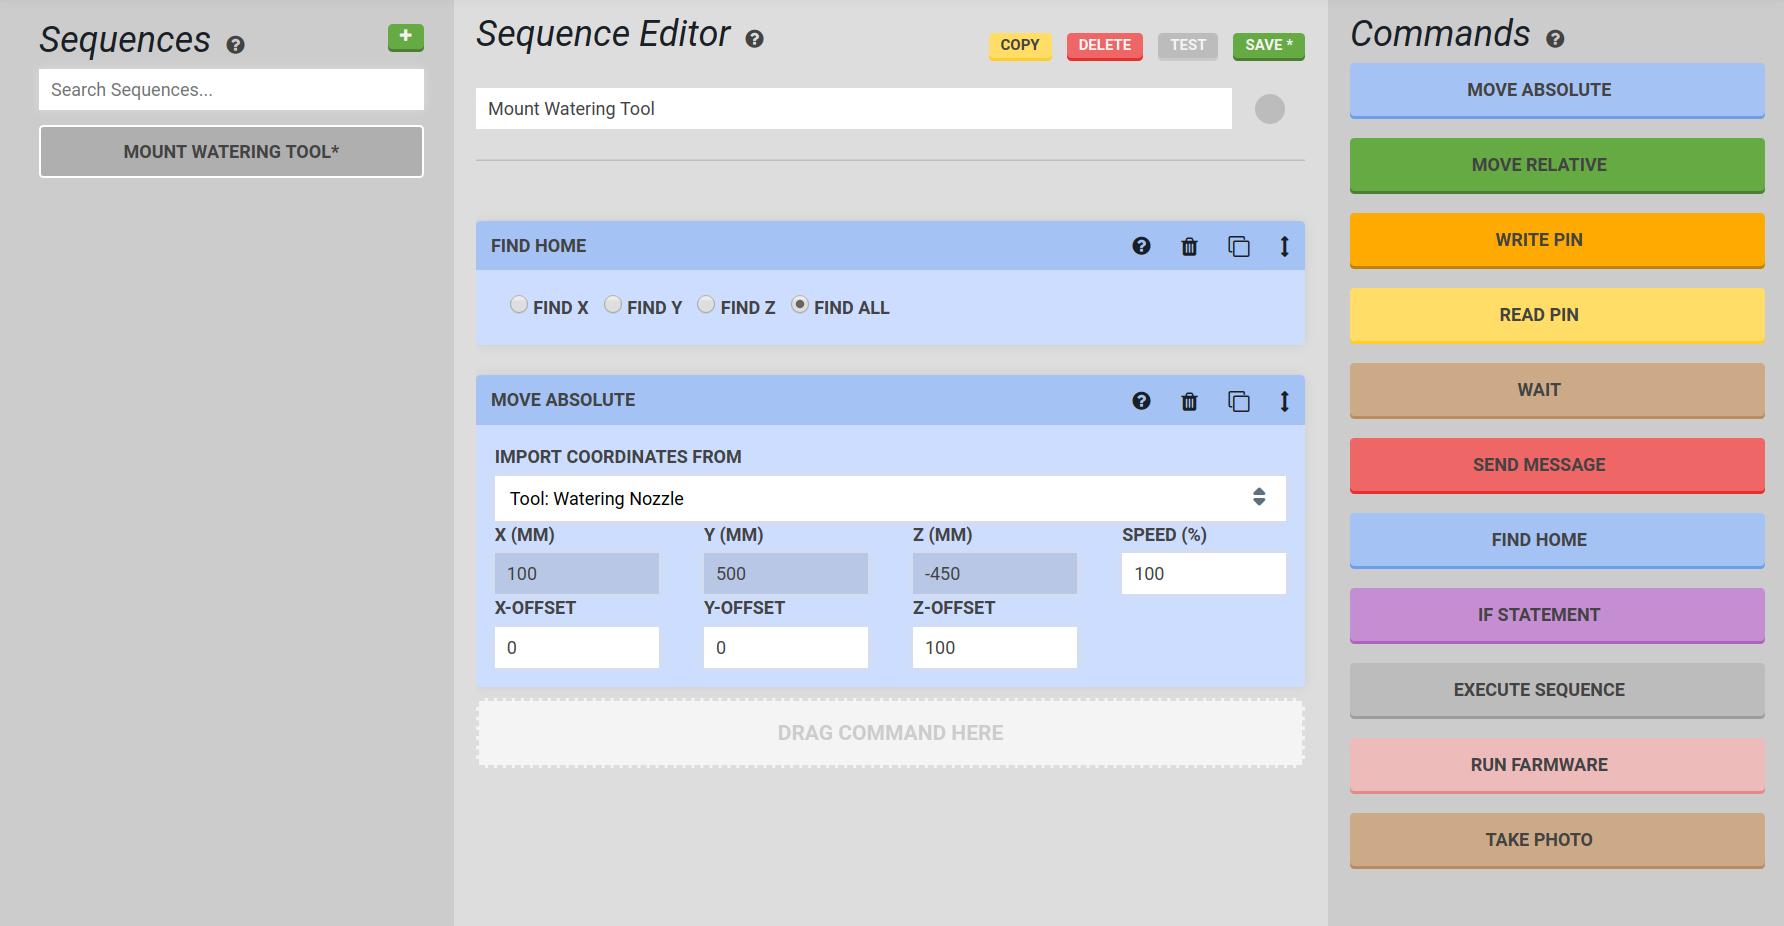
Next we’ll want FarmBot to descend directly down to make contact with the tool. Add another Move Absolute command as we did in the last step and select the Watering Nozzle in the Import Coordinates From dropdown as before. This time, there will not be an offset.
(Alternatively, press the copy icon () in the existing Move Absolute step (second icon from the right in the step’s info bar) and clear the offset.)
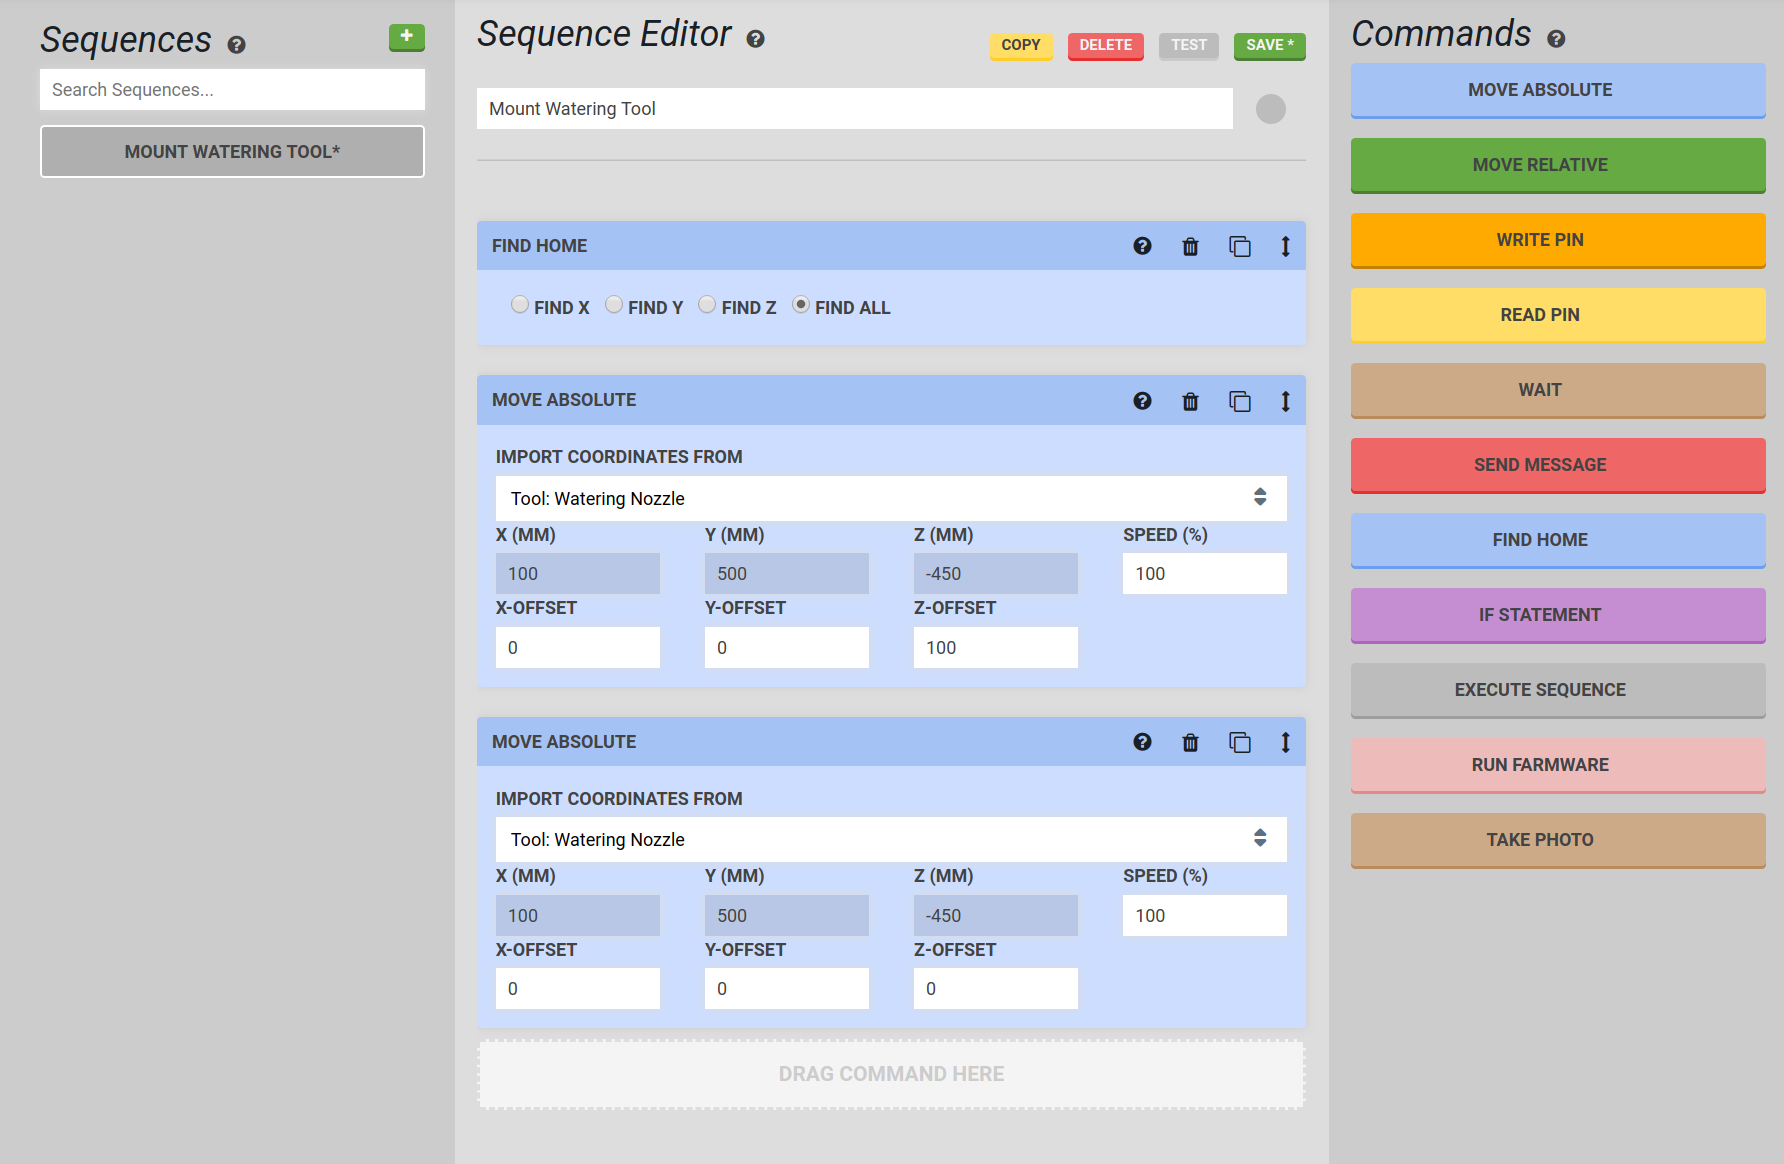
At this point, FarmBot’s UTM would be attached to the tool in the toolbay. The next step will be to pull the tool out of the toolbay. Add another Move Absolute command and select the Watering Nozzle as the coordinates, this time adding a 100 mm X-Offset.
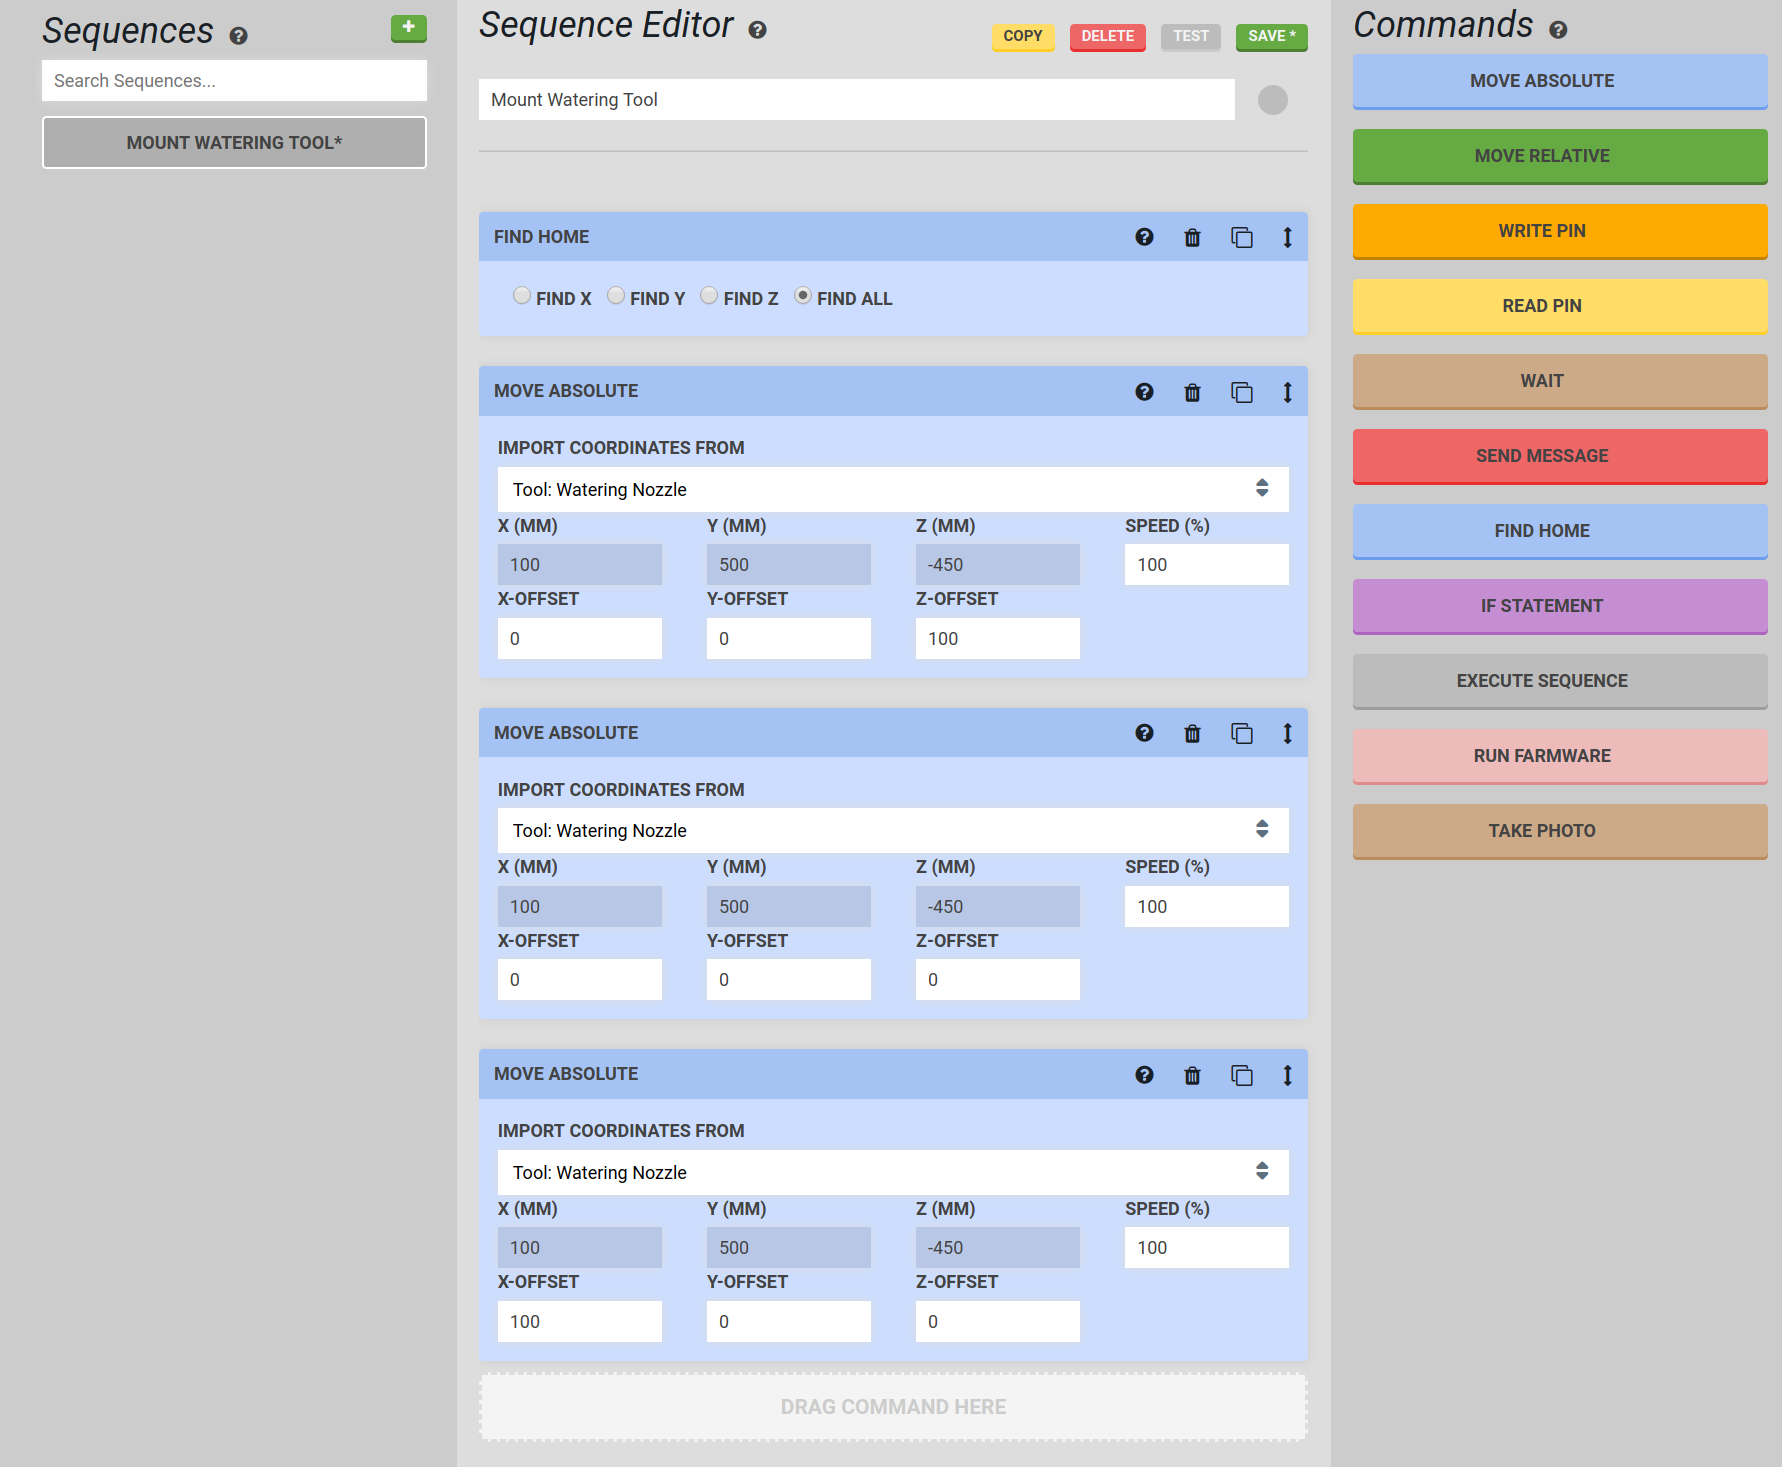
That’s it! Now press the button.
To recap, the steps are move to home, move directly above the tool, descend directly down to make contact with the tool, and move the tool out of the toolbay. Now you can use this sequence any time you would like to use the watering tool!
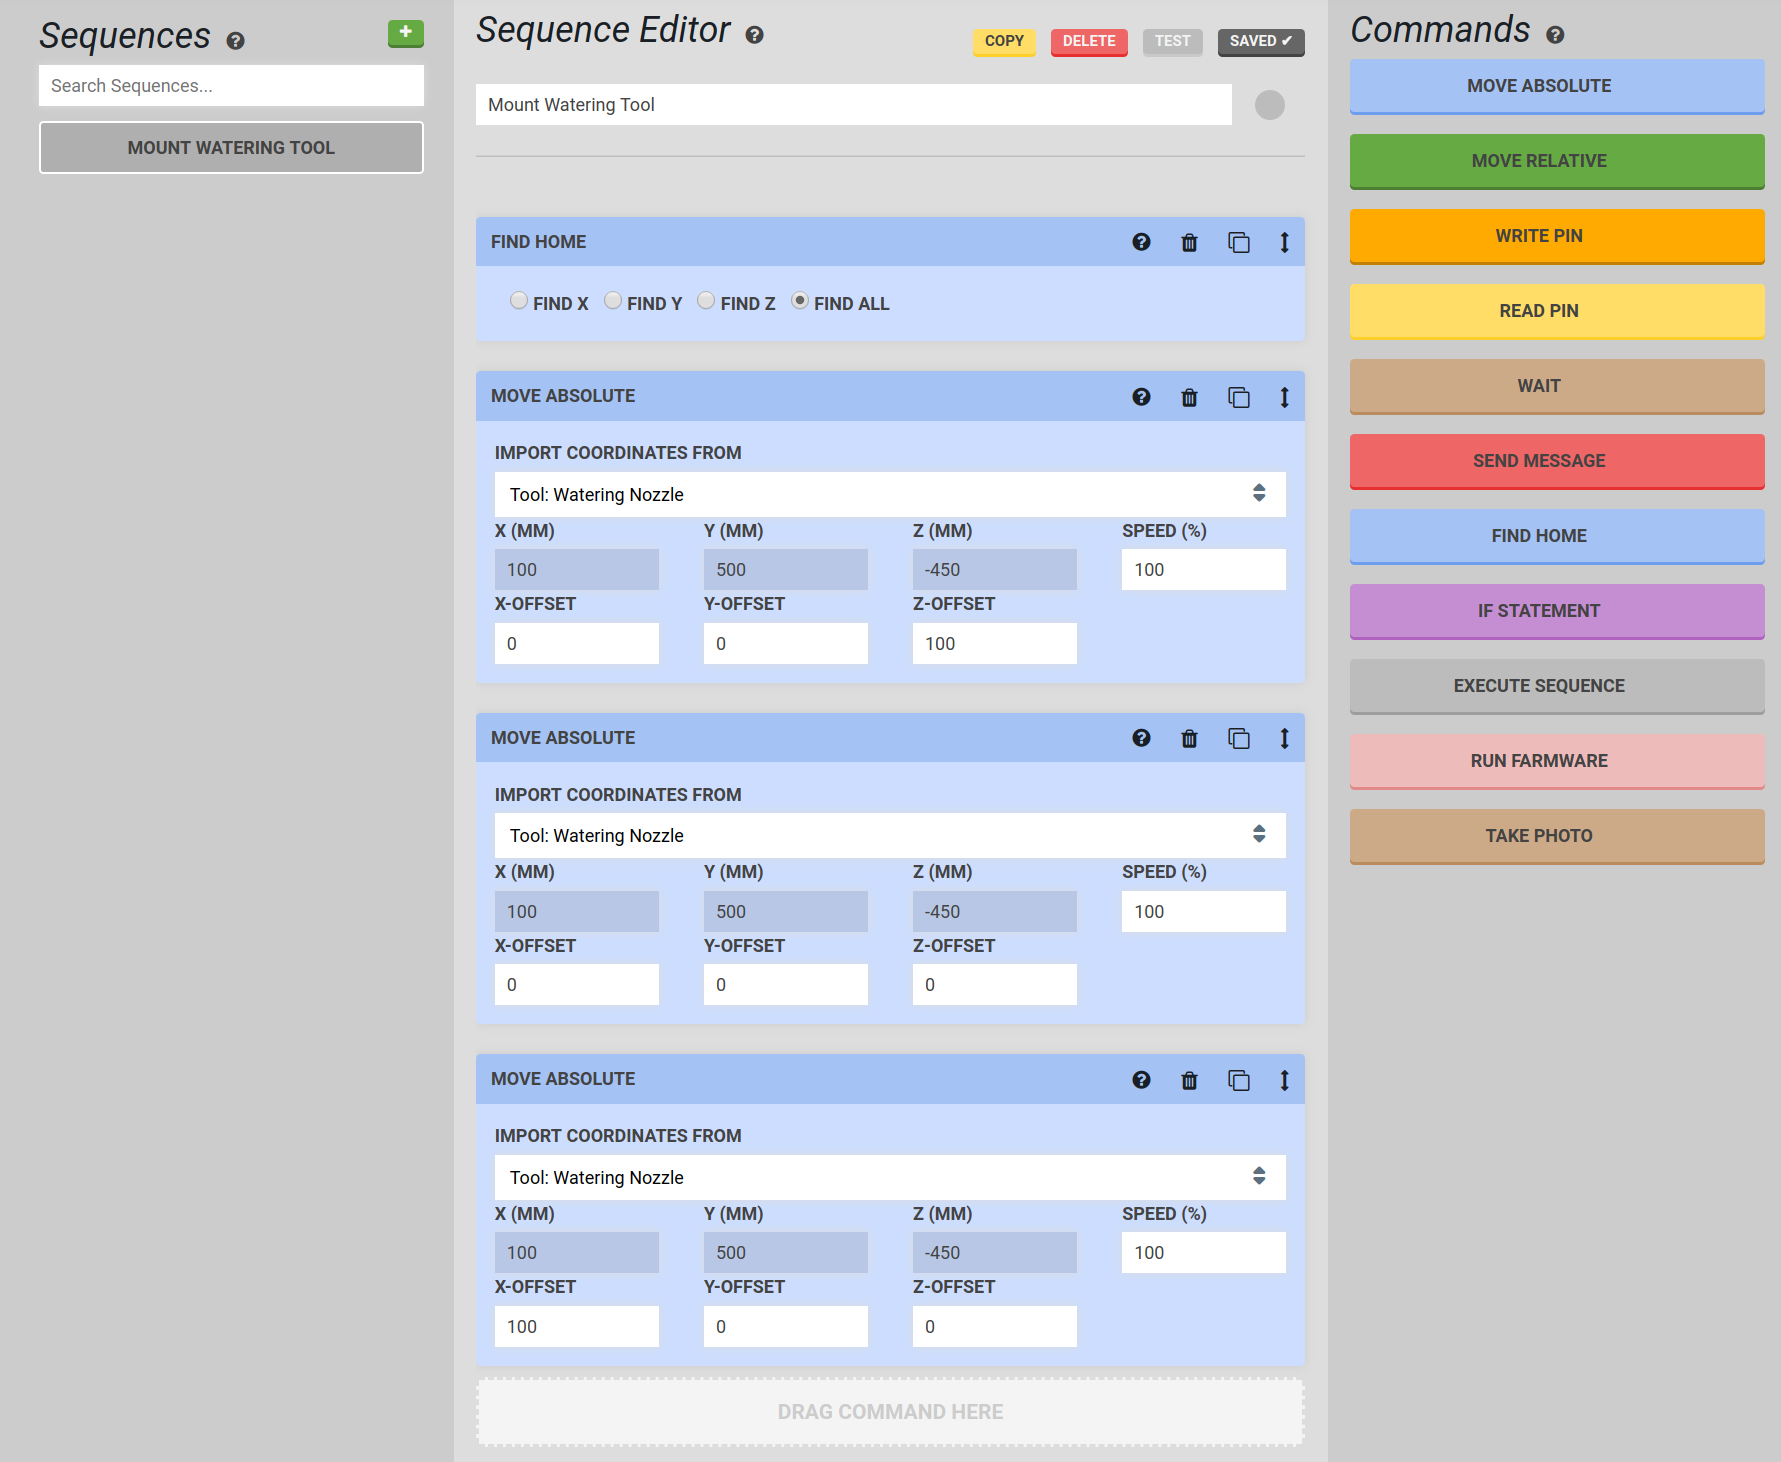
Don’t forget to before pressing to test your new sequence!
Your turn
Now that you’ve created a tool mounting sequence, try creating a sequence to return the tool to the toolbay.
Additional considerations
- It can be helpful to add an additional Move Absolute command at the end of the tool mounting sequence copying the inputs in the last step but with a positive z-offset. This can help prepare FarmBot for the next movement by moving above any nearby objects.
- It may be desirable to omit the
Find Homeat the beginning of the sequence if the sequence is being used within a larger sequence that already has aFind Homeat the beginning.
Example 2: Create a watering sequence
Now that we’ve created a sequence to mount the watering tool, we can create a sequence to use the tool. As an example, we have a Spinach plant at coordinates (200, 960, 0) that we would like to water.
- Mount the Watering Tool - Mount the watering nozzle by using the Execute Sequence step and selecting the
Mount Watering Toolsequence created in the previous section. - Move to above the Spinach plant - Move the watering nozzle above the plant to be watered (
(200, 960, 0)in this example) by making use of the Z-Offset input in the Move Absolute step. - Open the solenoid valve to start the flow of water - Add a Write Pin step to write
Pin 8with a value ofON(The pin number should correspond to the pin you have attached the solenoid valve to on the RAMPS board. See the peripherals widget instructions in order to test valve operation.) - Wait - Use the Wait step to continue watering the Spinach plant for 4000 milliseconds (4 seconds).
- Cose the solenoid valve - Use another Write Pin step to write
Pin 8with a value ofOFF, turning off the flow of water.
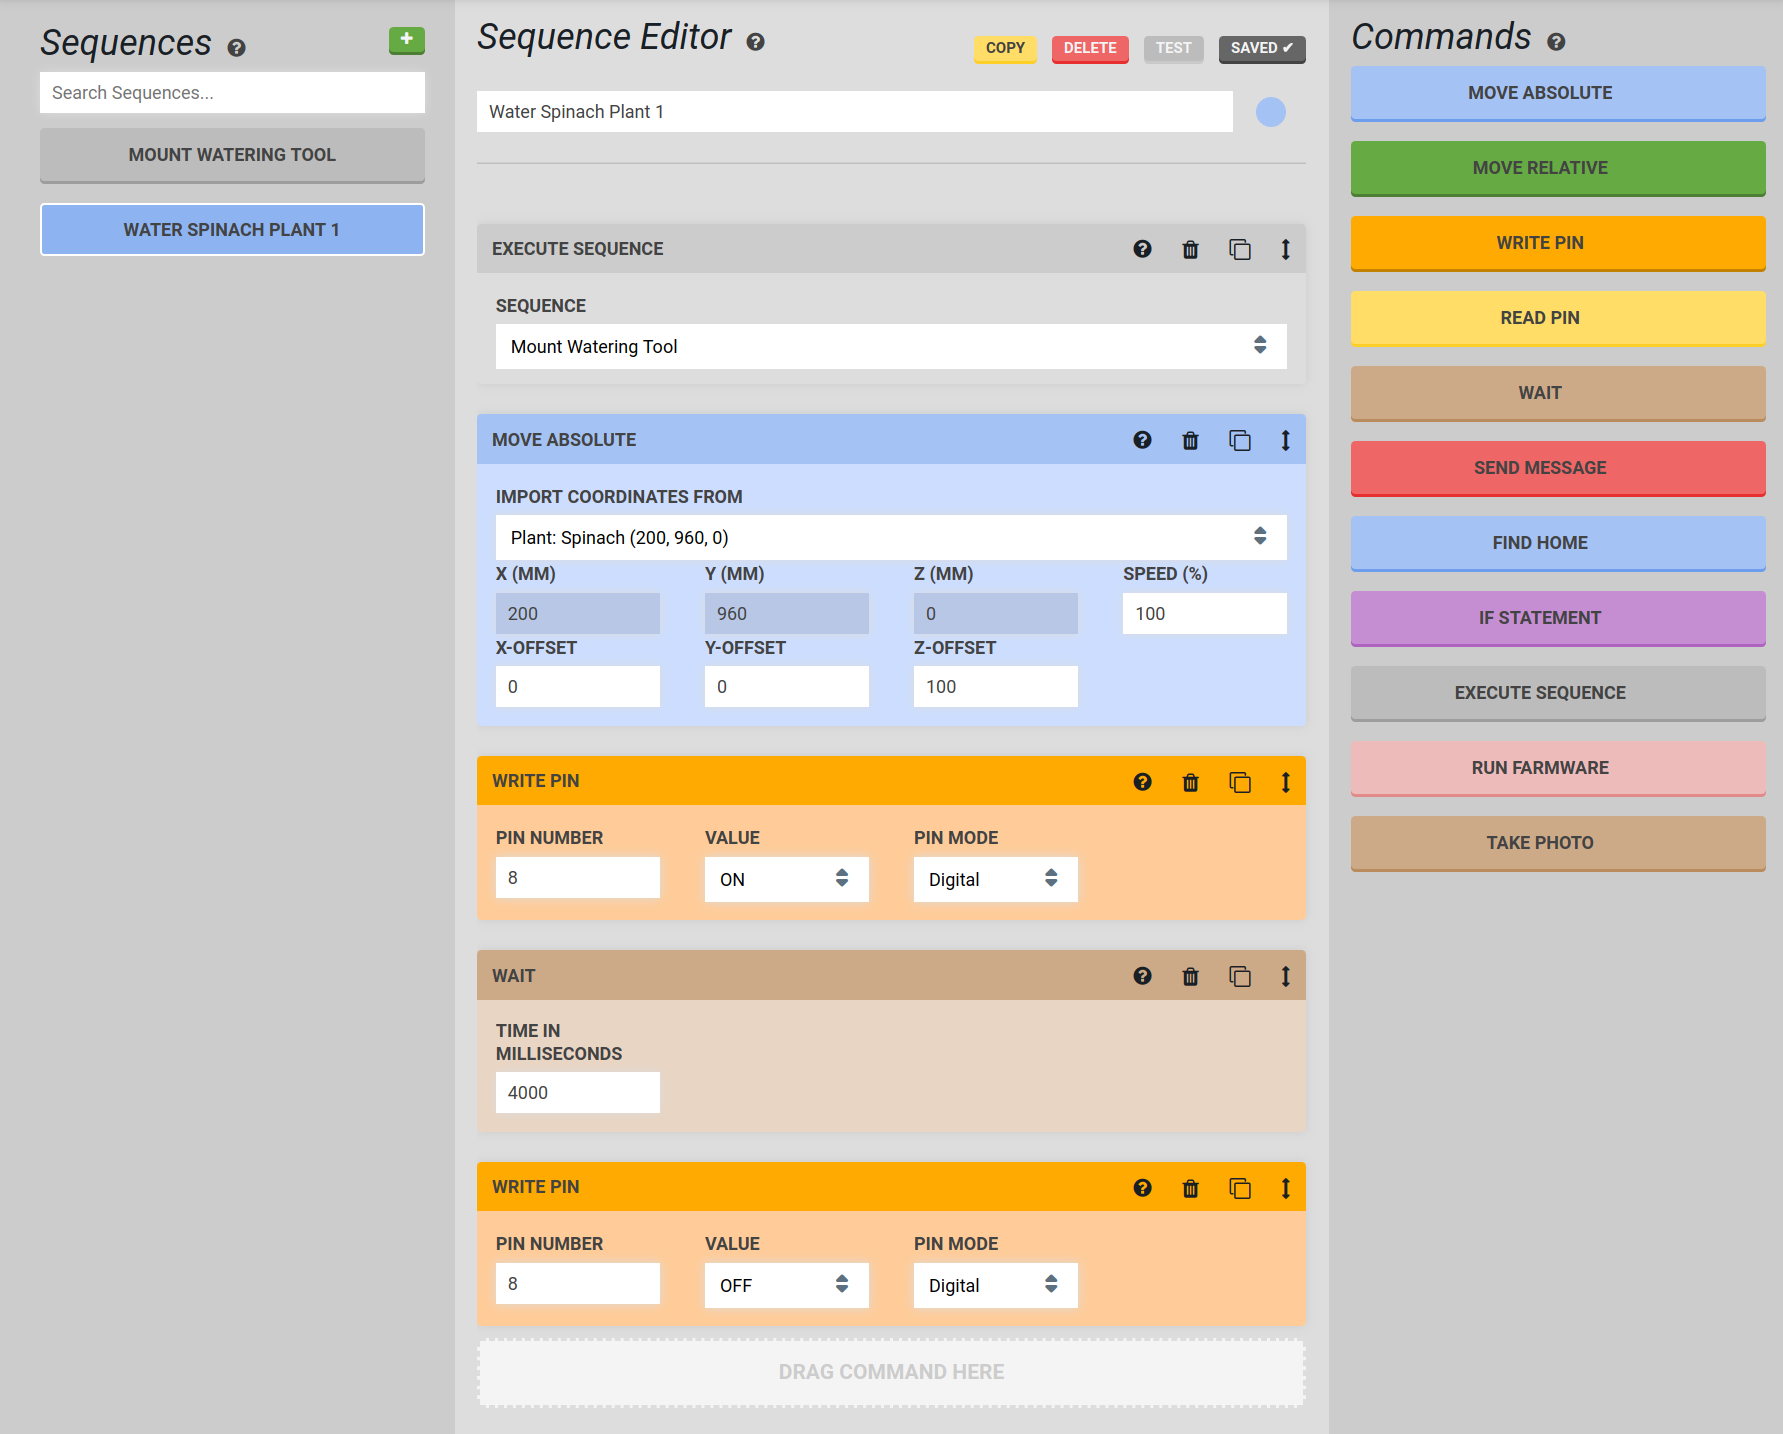
Press the button and then at the top of the page to sync your new sequence with the device, and press to try out your new sequence!
Example 3: Alternative watering sequence
The watering steps in the sequence shown above can be made into their own sequence, which increases re-usability and makes it easier to make changes to the watering action.
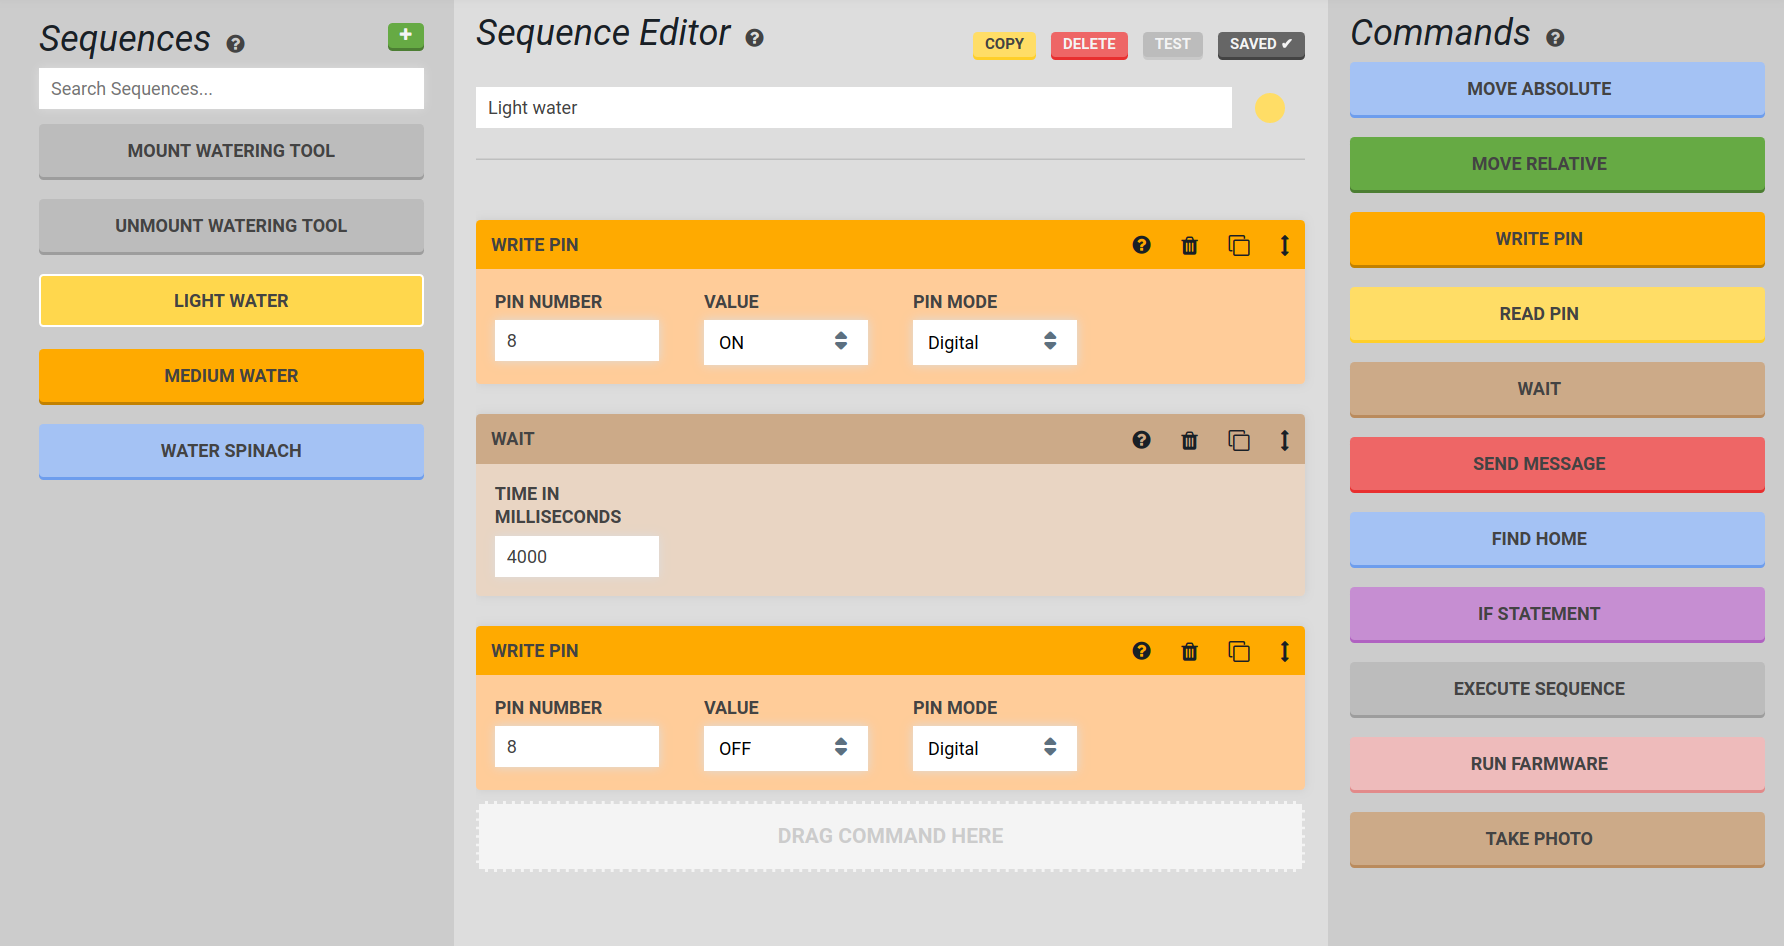
Then, the new water dispensing sequence can be added by using an Execute Sequence step after movement to each plant location.
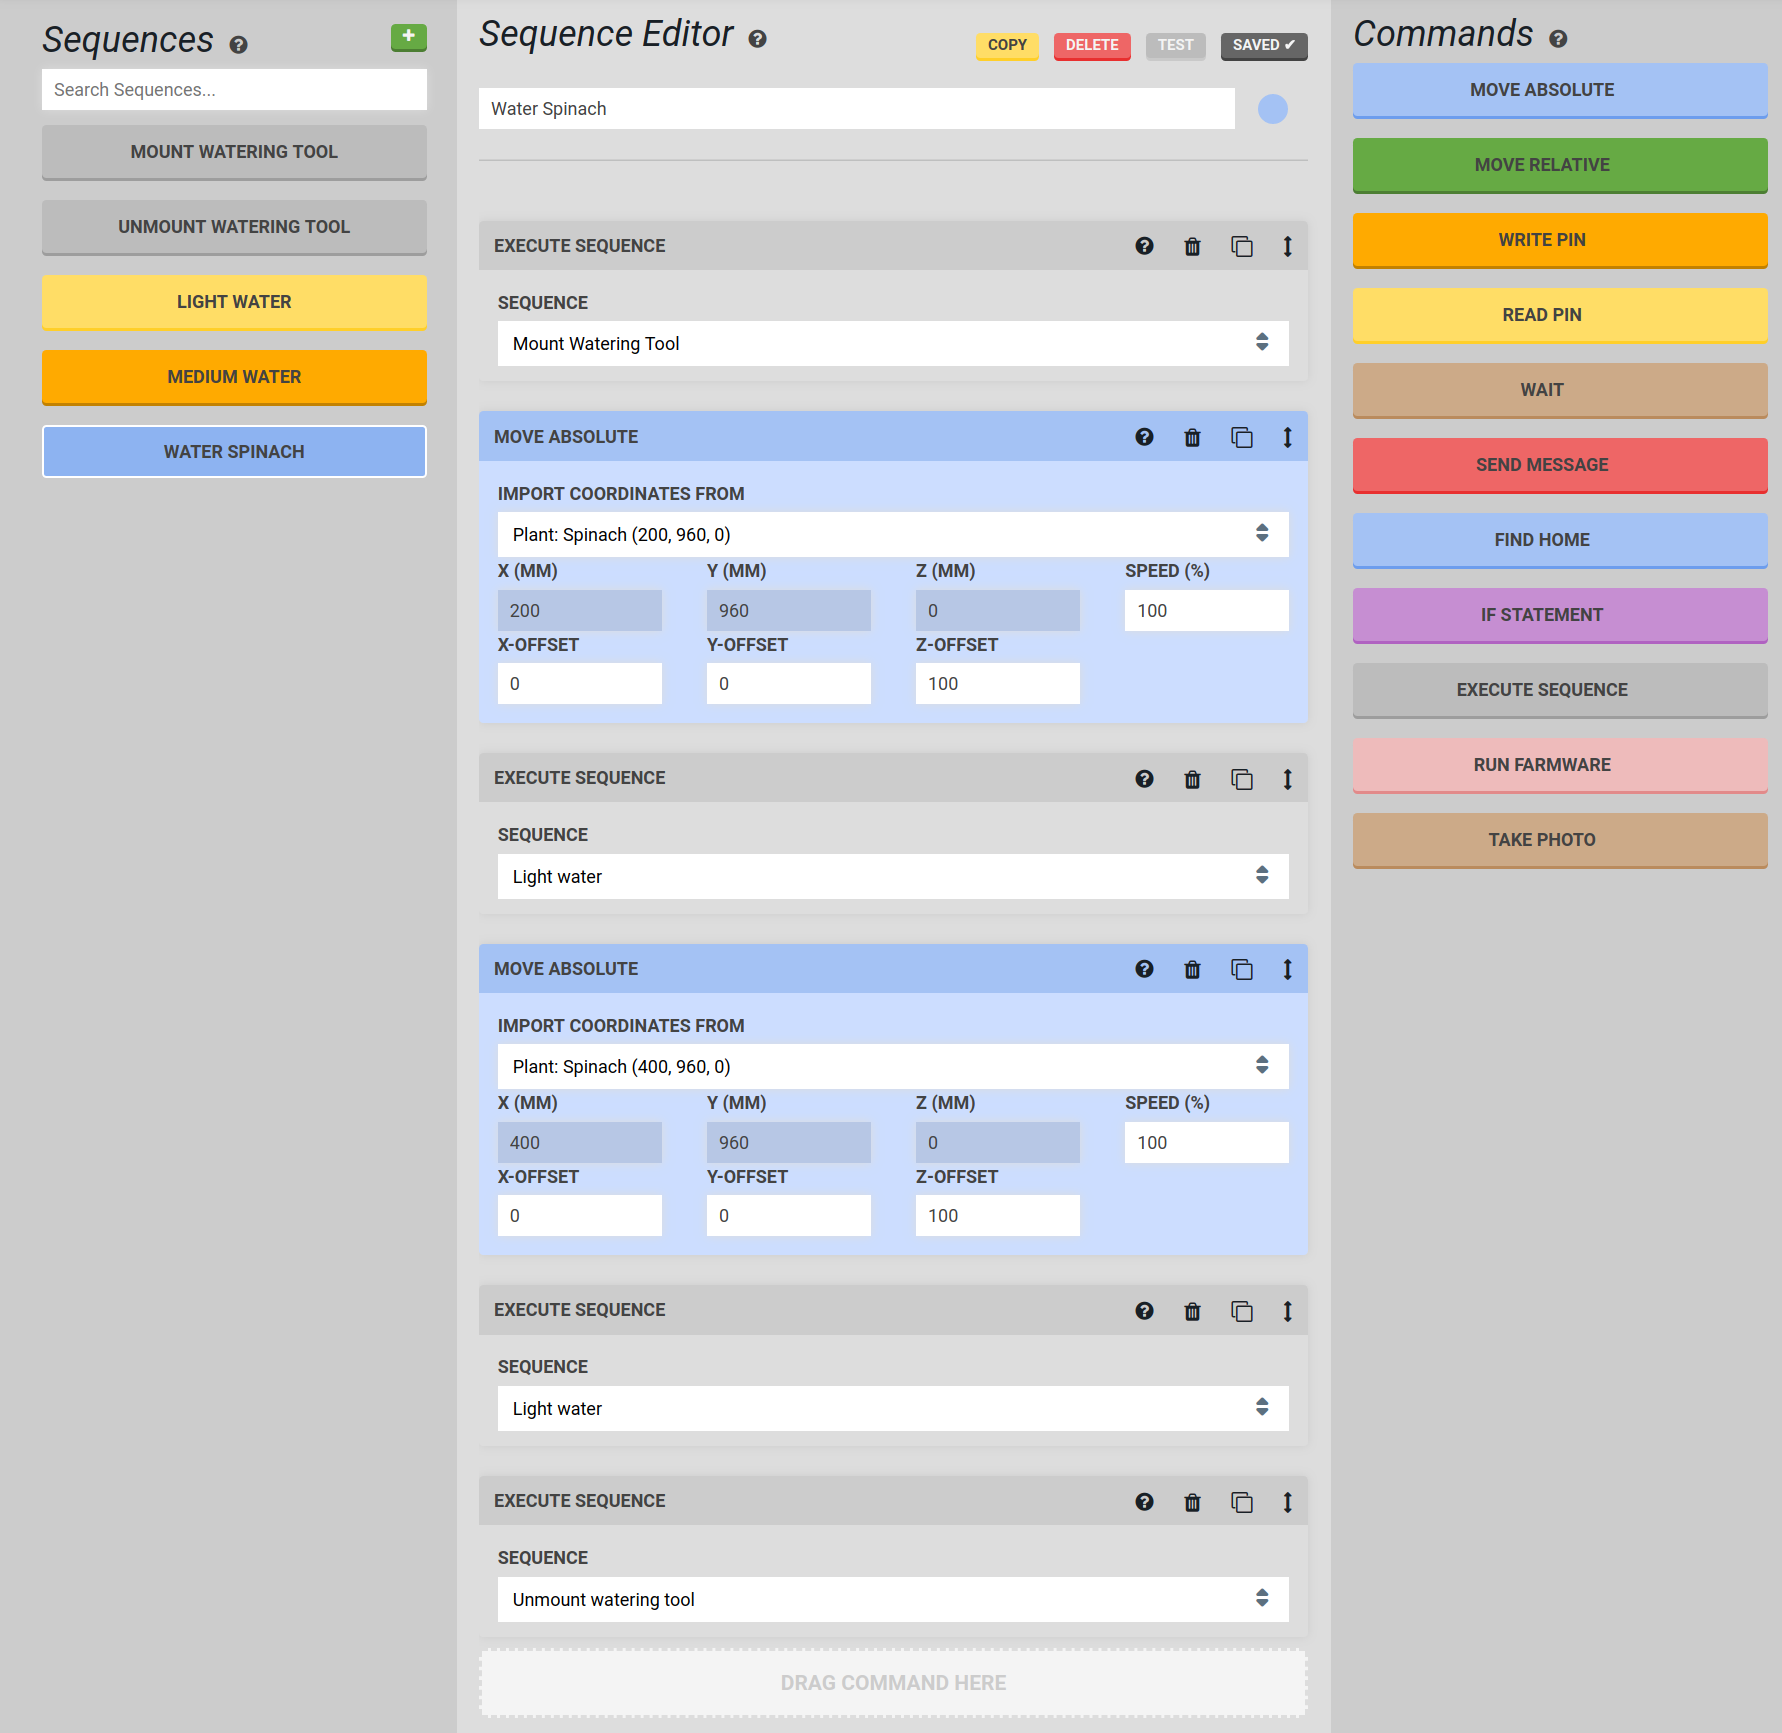
As you can see in this sequence, we have imported coordinates from plant locations in the Move Absolute step. These plant locations are defined in the Farm Designer.
As always, don’t forget to and before pressing to test the sequence!
Sequence building tips
Rearranging steps
Click and drag a step in the sequence editor to the empty space above or below any other step to drop it into that new position.