Watering Sequence
An example sequence to water a plant
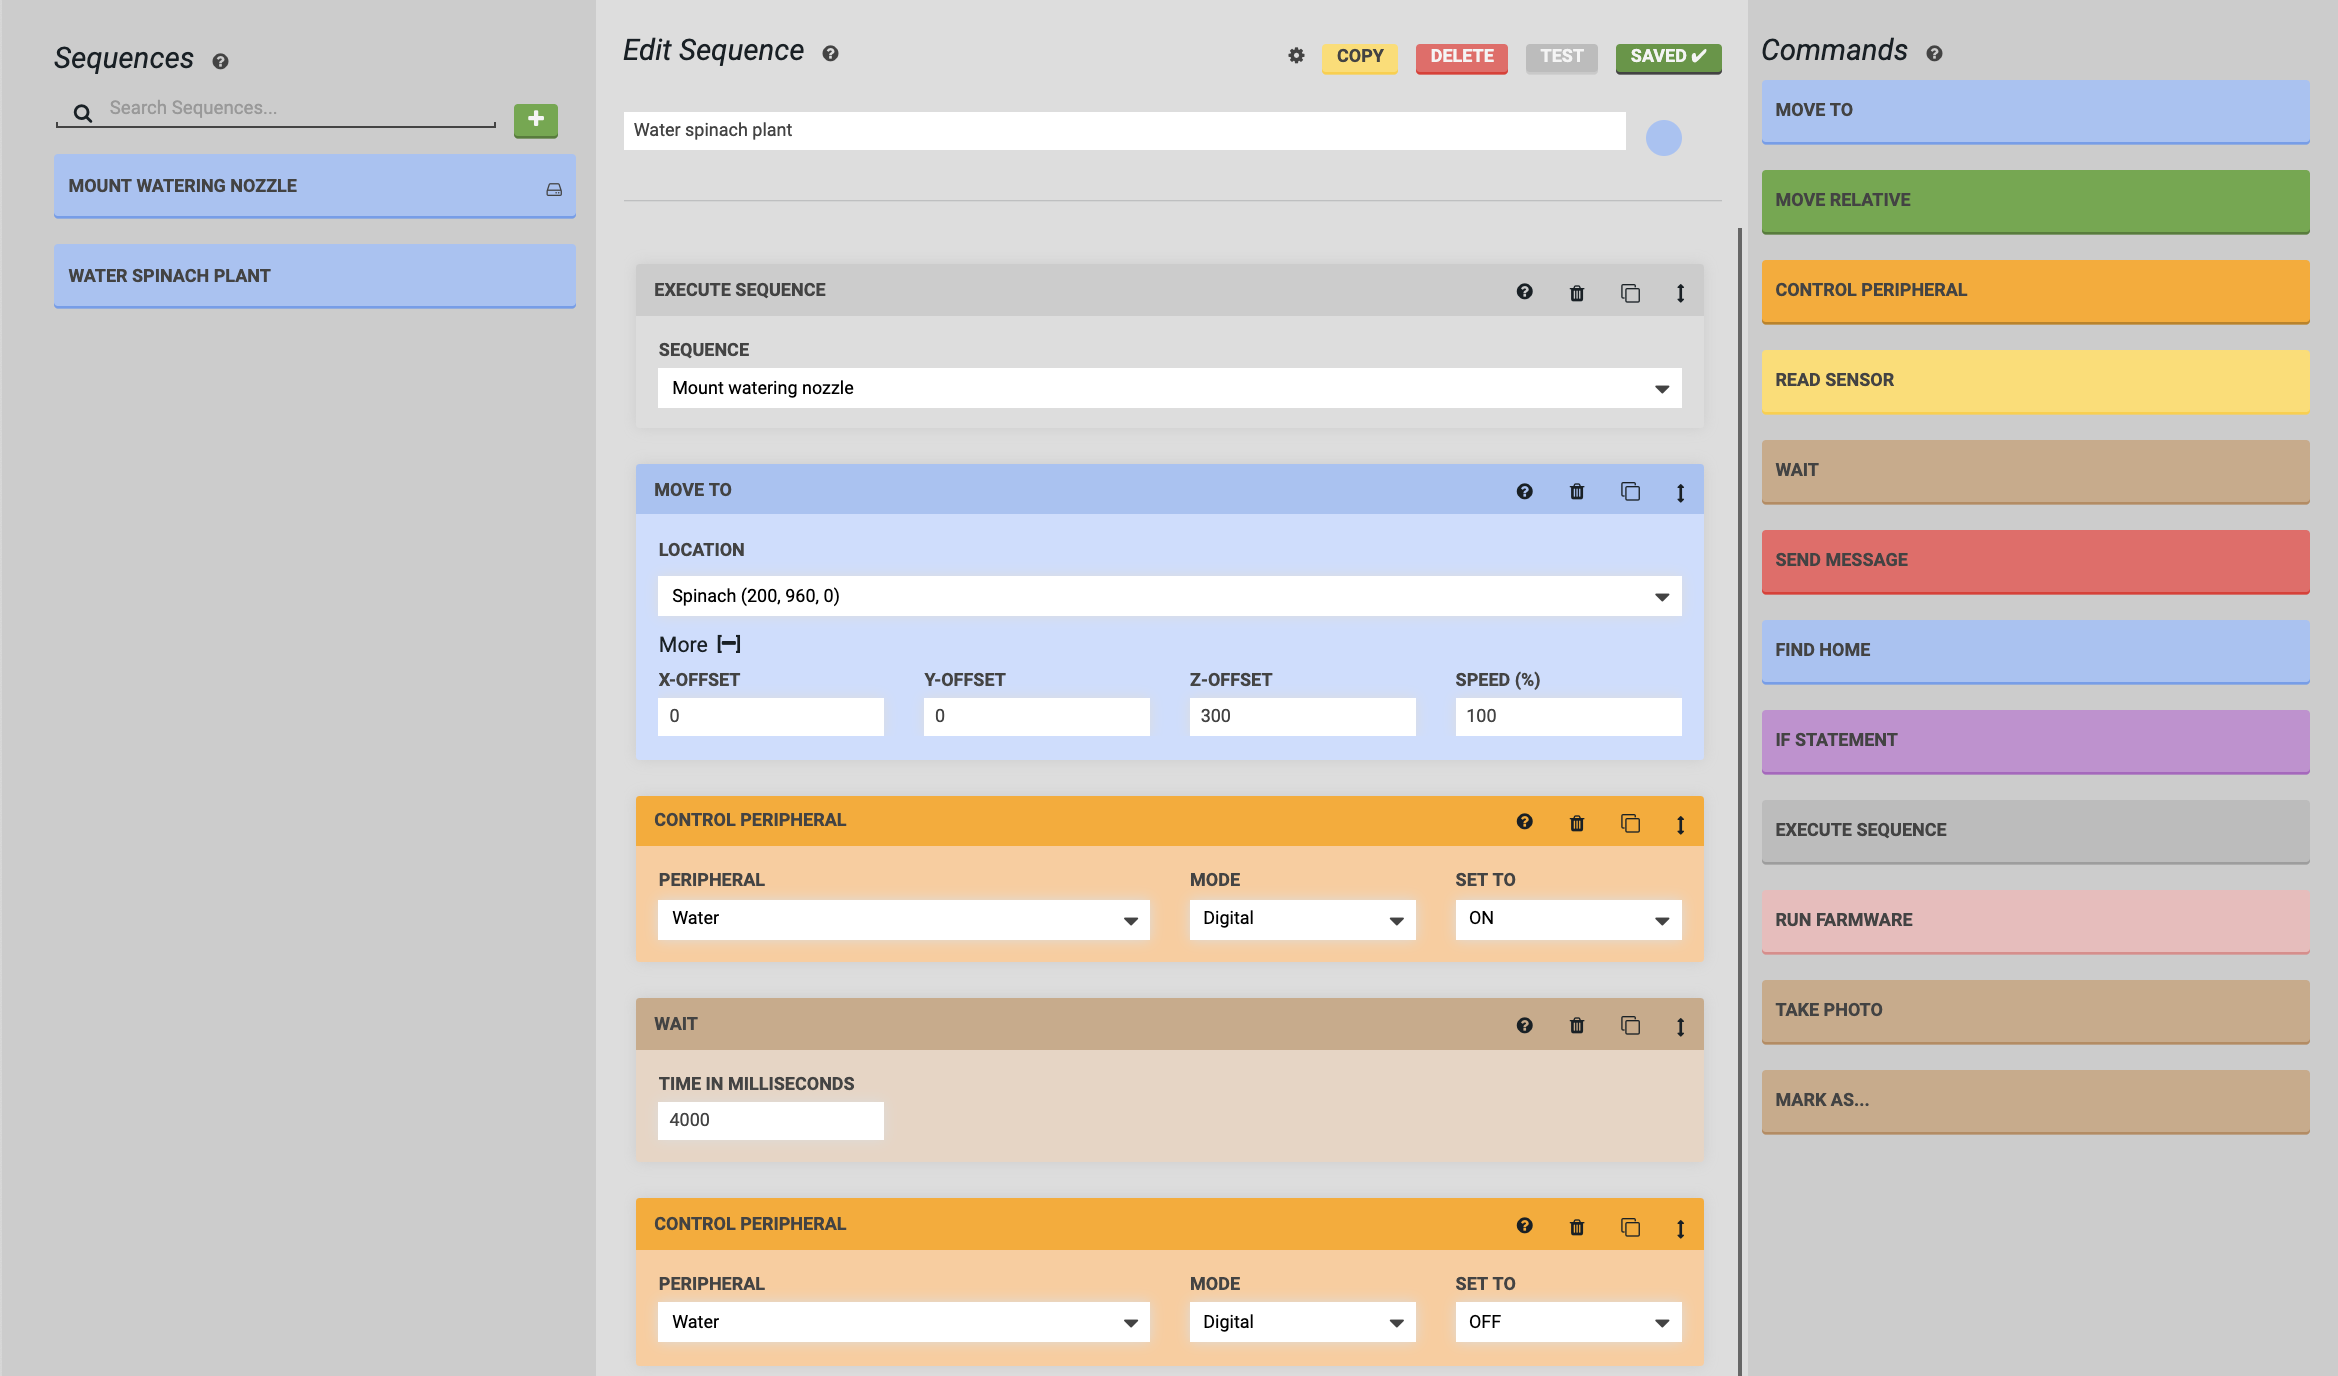
Now that we’ve created a sequence to mount the watering nozzle, let’s create a sequence to water a plant. In this example we’ll water a Spinach plant at coordinates (200, 960, 0).
- Mount the watering nozzle - Mount the watering nozzle by using the Execute step and selecting the
Mount Watering Nozzlesequence created in the previous example. - Move above the plant - Move above the plant by selecting the Spinach plant and making use of a Z-OFFSET.
- Open the solenoid valve - Add a Control Peripheral step to turn the
WaterperipheralON. This will start the flow of water. - Wait - Use a Wait step to continue watering the plant for
4000milliseconds (4 seconds). - Close the solenoid valve - Use another Control Peripheral step to set the
Waterperipheral toOFF, stopping the flow of water. - Save and test - Press the button and then to try out your new sequence!

Additional considerations
Put the watering nozzle tool away
Now that you’ve mounted the watering nozzle tool and used the tool to water a plant, use another Execute step and a third sequence to put the watering nozzle tool away.
Water any plant by using a variable
This sequence can only be used to water the specific Spinach plant chosen. Instead of making watering sequences for every plant in your garden, make this sequence a generic Water plant sequence that can be used on any plant by using a location variable.
Take a photo
While your FarmBot is located at the plant, consider using a Take Photo step to track the growth of your plant each time it is watered.
Modularize the watering action
Consider making a sequence that only contains the steps required for dispensing water: Control Peripheral, Wait, and Control Peripheral. This can then be changed more easily and re-used in different ways with Execute steps in other sequences.