Farmware Development
Plug-Ins to expand FarmBot functionality
Alpha
Farmware should be considered experimental at this point in time. Some features may be unstable.
First-Party Farmware
Some Farmware has been created by FarmBot.io and comes pre-installed:
- Take Photo - take a photo and upload it to the web app
- Plant Detection (coming soon) - detect weeds
Installing Farmware
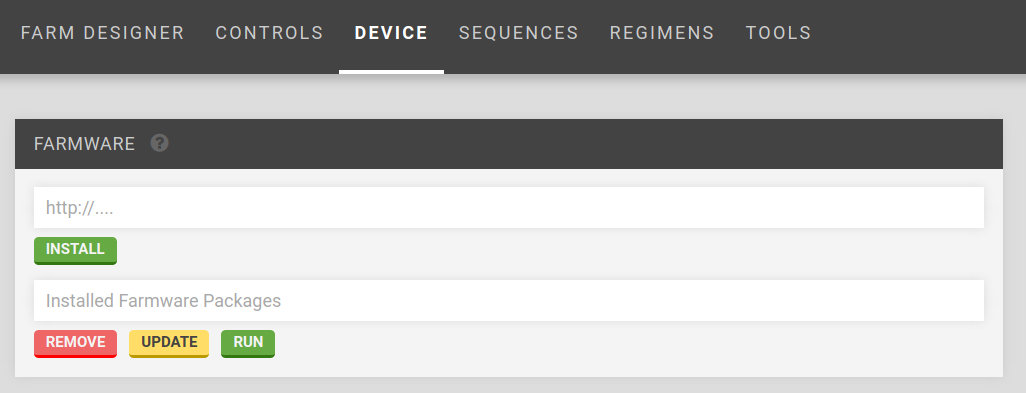
To install new Farmware, use the Farmware widget, currently located on the Device page of the FarmBot Web App.

Installation is performed by entering the URL of the manifest.json file for the Farmware.
For example, entering https://raw.githubusercontent.com/FarmBot-Labs/farmware_manifests/master/packages/take-photo/manifest.json and clicking install would install the Take Photo Farmware, whose source code is located at the GitHub project here. See Farmware manifest for more information.
Developing Farmware
Farmwares can connect with FarmBot in the following ways:
API
Use: long term information storage
Farmwares can access the FarmBot Web App API by using the token stored in the API_TOKEN environment variable. The API is used to access the database (plants, points, etc.).
Python example using ‘requests’ and ‘json’:
import os
import requests
import json

headers = {'Authorization': 'Bearer ' + os.environ['API_TOKEN'], 'content-type': "application/json"}
response = requests.get('https://my.farmbot.io/api/plants', headers=headers)
plants = response.json()
Environment Variables
Use: credentials
Environment variables are used to get credentials (token) and to interface with the FarmBot Web App. Set via Celery Script.
Python example:
import os

API_TOKEN = os.environ['API_TOKEN']
WRITE_PATH = os.environ['WRITE_PATH']
IMAGES = os.environ['IMAGES']
BEGIN_CS = os.environ['BEGIN_CS']
Redis
Use: bot status
Information about the device status is accessed via Redis. See redis.io.
Python example using ‘redis’:
import redis

r = redis.Redis()
device_current_location = r.lrange('BOT_STATUS.location', 0, -1)
Information available through redis:
BOT_STATUS
             configuration
                                      distance_mm_x       3000
                                      distance_mm_y       1500
                                      distance_mm_z       800
                                      fw_auto_update      false
                                      os_auto_update      false
                                      steps_per_mm_x      5
                                      steps_per_mm_y      5
                                      steps_per_mm_z      25
             informational_settings
                                      commit              4148a81
                                      compat_version      0
                                      controller_version  3.0.7
                                      locked              false
                                      private_ip          192.168.1.101
                                      sync_status         synced
                                      target              rpi3
             location
                                      x                   110
                                      y                   220
                                      z                   -100
Celery Script
Use: real-time web app communication and bot actions
Celery Script is JSON sent to FarmBot OS to perform actions such as device movements and setting environment variables.
Send Celery Script available actions by printing to STDOUT prefixed with the BEGIN_CS environment variable.
Python example using ‘json’:
import json

add_point = {
  "kind": "add_point",
  "args": {
    "location": {
      "kind": "coordinate",
      "args": {
        "y": 100,
        "x": 200,
        "z": 0
      },
      "radius": 50,
      "body": []
    }
  }
}
print(os.environ['BEGIN_CS'] + json.dumps(add_point))
Currently supported languages and packages
- Python: opencv, numpy, redis-py, requests
Farmware manifest
To install a Farmware, you need to create a manifest.json file and host it.
Farmware Manifest Example:
 "package": "take-photo",
 "language": "python",
 "author": "Farmbot.io",
 "description": "Take a photo with a USB camera using Python OpenCV.",
 "version": "0.0.1",
 "min_os_version_major": 3,
 "url": "https://raw.githubusercontent.com/FarmBot-Labs/farmware_manifests/master/packages/take-photo/manifest.json",
 "zip": "https://github.com/FarmBot-Labs/Take-Photo/archive/master.zip",
 "executable": "python",
 "args": ["Take-Photo-master/take_photo.py"]
zip points to the hosted source code zip file. Github makes this easy: just add /archive/master.zip to the end of the GitHub repository URL, and insert <repository name>-master/ to the beginning of the script filename to run, as seen in the manifest example above.